Picture this: you glance up at your roof on a sunny Arizona afternoon and wonder if those blank tiles could be doing something more than just collecting dust.
You’ve probably heard the buzz about residential solar installation, but the idea can still feel a bit intimidating—like figuring out a new puzzle without the picture on the box.
The good news? It’s not as complex as it seems, and the payoff can be surprisingly personal: lower electric bills, a smaller carbon footprint, and a sense of independence that feels like winning a tiny victory every month.
So, what’s actually involved from the moment you decide to go solar to the day the panels start soaking up the sun?
First, we sit down (often over a cup of coffee) to assess your home’s orientation, roof condition, and energy usage. This isn’t a one‑size‑fits‑all checklist; it’s a quick audit that tells us whether a rooftop array makes sense for your specific situation.
Next comes the paperwork—permits, interconnection agreements, maybe a few incentives you didn’t even know existed. It sounds like a lot, but a seasoned solar installer walks you through each step, turning red tape into a simple to‑do list.
Then the crew arrives, usually in a matter of days, and mounts the panels, runs the wiring, and connects everything to your inverter. Most homeowners watch the final hook‑up like a small fireworks show, because that moment when the system flips on is oddly satisfying.
But what about cost? Think of it like buying a high‑efficiency appliance: the upfront price can be higher, yet the savings over time—often 5 to 10 years—offset that initial investment, especially with federal and Arizona tax credits still in play.
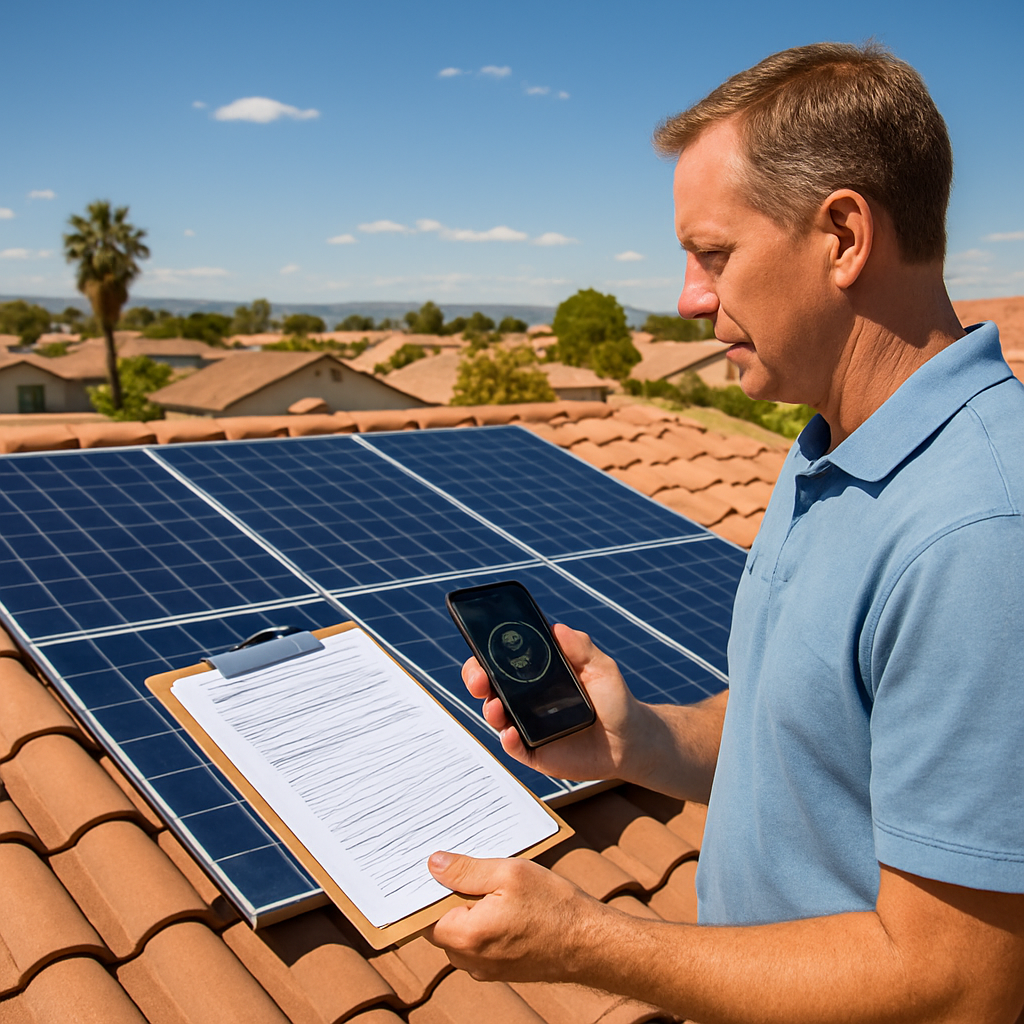
And don’t forget maintenance. Residential solar installation isn’t a set‑and‑forget gadget; a quick visual check twice a year and occasional cleaning keep the panels humming.
If any of this feels a bit fuzzy, you’re not alone. We’ve helped dozens of homeowners turn that fuzziness into clarity, and we’ll walk you through each phase so you never feel left in the dark.
TL;DR
Residential solar installation transforms a sunny roof into a reliable, low‑cost power source, slashing monthly bills and boosting home value while cutting carbon footprints. We’ll guide you through the quick audit, paperwork, installation, and simple maintenance steps so you can enjoy hassle‑free energy savings within months, plus peace of mind knowing everything’s compliant and backed by local incentives.
Step 1: Assess Your Home’s Solar Suitability
Okay, so you’ve decided to see if your roof can actually become a little power plant. First thing we do is ask yourself: does the sun actually hit my house most of the day? If you’ve ever stood on your patio at noon and felt the heat on the floor, you’re already halfway there.
And don’t worry, we’ll keep the tech jargon to a minimum. Think of this step like a quick health check‑up for your house – a few simple measurements and a glance at the roof’s condition, then you’ll know if solar makes sense.
Check Your Roof Orientation and Tilt
South‑facing roofs in the Northern Hemisphere catch the most sun, but east‑ or west‑facing can still work fine if the tilt is right. Grab a compass app on your phone, point it at the roof, and note the direction. A tilt between 15° and 40° is usually ideal. If your roof is flat, you’ll probably need a mounting system that adds angle.
Does your roof have shading from trees, chimneys, or neighboring houses? Even a small shadow during peak hours can shave off a chunk of potential energy. Walk around at 10 am and 2 pm and see where the shade falls – it’s that simple.
Evaluate Structural Integrity
Next, we need to make sure the roof can actually hold the panels. Most residential roofs are fine, but older roofs or those with missing shingles might need repairs first. Look for sagging, cracked tiles, or any signs of water damage. If you spot something, it’s cheaper to fix now than after the panels are up.
And here’s a pro tip: ask your installer to do a “load‑bearing assessment.” It’s a quick inspection that tells you if any extra reinforcement is needed – no need for a full engineering report unless you have a very large system.
Measure Your Energy Use
Pull your last 12 months of electric bills (or just the most recent ones) and add up the kilowatt‑hours (kWh). That number is your baseline. If you’re using 1,200 kWh a year, a 5 kW system could cover most of it, depending on sunlight.
Tip: look for seasonal spikes – maybe the AC runs hard in summer or the heater in winter. Those peaks help you size the system correctly. And if you’re already thinking about a battery, note when you use the most electricity; that’ll guide storage capacity.
Now, let’s talk about the bigger picture. If you’re already eyeing an electric vehicle, pairing it with solar can make the whole household run greener. A quick look at AI‑powered EV assistant Selene shows how drivers plan charging around solar production.
And while you’re polishing up the look of your home, consider window treatments that keep heat out in summer and let light in during winter. Harvey Bruce blinds and shutters offer options that complement solar by improving overall energy efficiency.
Below is a short video that walks you through a typical roof audit – it’s basically a visual checklist you can follow while you’re out on the ladder.
Take a moment after the video to jot down the answers to these three questions:
- Is my roof south‑facing or at least getting sun most of the day?
- Is the roof in good shape, or does it need repairs?
- What’s my average annual electricity use?
When you’ve got those answers, you’re ready for the next step: crunching the numbers and talking to a local installer. If you’re in Phoenix, Solar Energy Installation in Phoenix, AZ is a solid place to start – they’ll take your audit data and turn it into a clear proposal.
Finally, a quick checklist you can print out:
- Compass direction and tilt of roof
- Shade map at 10 am and 2 pm
- Roof condition notes
- Yearly kWh usage
- Potential EV charging needs
- Window treatment upgrades
Keep that sheet handy when you call a solar pro. It’ll shave hours off the quote process and give you confidence that you’ve done the legwork yourself.

Step 2: Calculate System Size and Cost
Okay, you’ve measured the roof, you’ve got your sun‑hours, and now you’re wondering, ‘How big does my system need to be, and what’s it going to cost?’ That moment of “let’s get real” is exactly where most homeowners get stuck.
First thing’s first: grab your latest electric bill. Look at the total kilowatt‑hours (kWh) you used over the past year. That number is the baseline for everything that follows.
Next, divide that annual usage by the average sun‑hours you get in Arizona – roughly 6 hours per day, or about 2,190 hours a year. The result gives you the kilowatts you’ll need before accounting for system losses.
Here’s a quick mental math trick: if you used 12,000 kWh last year, 12,000 ÷ 2,190 ≈ 5.5 kW. Add a 10‑15% buffer for shading, inverter loss, and future‑proofing, and you land around a 6‑7 kW system. That’s the sweet spot for most single‑family homes in Phoenix.
Want to see the numbers in action? Let’s walk through a real‑world example. The Martinez family in Tucson used 13,200 kWh last year. Using the same calculation, they needed about 6 kW. Because their roof faced slightly west, they added a 1 kW buffer, ending up with a 7 kW array – roughly 20‑25 panels, depending on wattage.
Now that you have a ballpark size, it’s time to talk dollars. SolarReviews reports the average cost per watt in Arizona sits around $2.79 after the federal tax credit. Multiply that by your system size and you get a rough upfront figure. For a 7 kW system, that’s about $19,500 before any local incentives.
That video walks you through the calculator step‑by‑step, so pause it if you need to pull out your pen.
But the headline price isn’t the whole story. Break it down: panels themselves are only about 12% of the total cost, roughly $200 per panel before installation. Inverters, racking, wiring, and labor make up the rest, with “soft costs” like permitting and design accounting for another 20‑25%.
Don’t forget financing. Buying with cash gives you the lowest lifetime cost, but many homeowners prefer a solar loan to spread payments over 10‑20 years. Keep in mind that loans add interest – the average loan‑based cost per watt climbs to about $3.60, according to the same SolarReviews data.
Leases and power‑purchase agreements (PPAs) require zero upfront cash, but you’ll never own the system, so you miss out on the tax credit and the highest possible savings.
Actionable tip: pull three quotes from local installers, ask each for a detailed line‑item breakdown, and compare the cost‑per‑watt after incentives. The lowest headline price isn’t always the best deal if the warranty or equipment quality is sub‑par.
Finally, run the numbers one more time with your local utility’s net‑metering rates. That will show you how much of your solar production will actually offset your bill versus being sent back to the grid.
When you finish this exercise, you’ll have a clear, numbers‑backed picture of both the system size you need and the realistic cost you’ll face – the foundation for a confident residential solar installation decision.
Step 3: Compare Solar Panel Options
Alright, you’ve got a ballpark system size and a price range – now the fun part begins: deciding which panels actually belong on your roof.
Ever stare at a shelf of gadgets and wonder which one will actually make your life easier? Solar panels are the same story. You could grab the cheapest 250 W module and end up swapping panels in a few years, or you could spend a bit more for a high‑efficiency panel that squeezes more power out of the same roof space.
1. Define what matters most to you
Do you have a small rooftop and need every square foot to count? Or are you more focused on getting the longest warranty possible? Write down your top three criteria – efficiency, temperature coefficient, and warranty are the usual suspects.
When you look at efficiency numbers, remember that modern monocrystalline panels now push past 24% conversion, thanks to N‑type cell designs like HJT, TOPCon, and back‑contact (IBC) cleanenergyreviews explains the tech. Higher efficiency means you can fit a bigger system on a limited roof, which often translates to lower overall cost per watt.
2. Pull the spec sheets and line‑item costs
Ask each installer for a detailed quote that breaks out panel model, wattage, and price per watt after incentives. Don’t just glance at the headline total – a $19,500 offer with 250 W panels looks cheap until you realize you need 30 panels, while a $21,000 quote for 400 W high‑efficiency modules might actually be cheaper per watt.
SolarReviews’ recent ranking shows brands like Canadian Solar, JA Solar, and Qcells delivering a solid blend of performance, price, and warranty coverage SolarReviews’ expert panel list. If your installer suggests a brand outside the top‑10, ask why – there might be a good local reason, but you’ll want to be sure it isn’t just a discount on a lower‑quality product.
3. Compare temperature performance
Arizona summers can push panel surface temperatures 20‑30 °C above ambient. A panel’s temperature coefficient tells you how much power you lose as it heats up. Look for numbers around –0.25 %/°C (the best you’ll see) versus –0.40 %/°C on older P‑type cells. The lower the coefficient, the less your output drops on those scorching days.
4. Scrutinize the warranty
Most manufacturers offer a 25‑year product warranty and a separate performance guarantee. Some premium brands lock in 30‑year performance warranties and promise less than 0.3 % annual degradation. Those details can add a few hundred dollars now but save you headaches later.
5. Build a side‑by‑side table
Take the data you’ve gathered and pop it into a quick table. Seeing “Efficiency %,” “Temp Coeff %/°C,” “Warranty Years,” and “Cost $/W” side‑by‑side makes the trade‑offs crystal clear.
| Criterion | Option A (250 W, 18% eff.) | Option B (400 W, 23% eff.) | Notes |
|---|---|---|---|
| Efficiency | 18 % | 23 % | Higher efficiency fits more power on limited roof. |
| Temperature Coefficient | -0.38 %/°C | -0.26 %/°C | Option B loses less power in heat. |
| Warranty | 25 yr product / 0.4 %/yr degradation | 30 yr product / 0.25 %/yr degradation | Longer warranty adds confidence. |
| Cost per Watt (after incentives) | $0.35/W | $0.42/W | Higher upfront, but more energy over life. |
Now, ask yourself: which row feels like the best fit for your roof, budget, and climate? If the higher‑efficiency panel still fits your budget after the tax credit, it usually wins the math.
Actionable checklist
- Write down your top three panel priorities.
- Collect at least three detailed quotes that list panel model, efficiency, temperature coefficient, warranty, and cost per watt.
- Create a comparison table like the one above.
- Run a quick ROI check: multiply the efficiency gain by your roof’s square footage to see how many extra kilowatt‑hours you’ll harvest.
- Pick the option that meets your priority list and shows the best long‑term value.
When you finish, you’ll have a clear picture of which panels will actually deliver the energy you need, without surprise surprises down the road. That confidence is the missing piece that turns “maybe I’ll go solar someday” into “let’s lock in my residential solar installation today.”
Step 4: Choose an Installer and Review Incentives
Okay, you’ve sized your system and picked your panels – now the real people show up. Picking the right installer is kind of like dating: you want chemistry, trust, and a solid track record, not just a shiny brochure.
Start with credentials, not just a logo
First thing’s first: make sure the company holds a NABCEP certification. That’s the industry’s gold‑standard badge, and it tells you the installer has passed a rigorous test on everything from electrical codes to safety practices. If you can’t find the certification on their website, ask for proof – a reputable installer will gladly pull it up.
Second, check how long they’ve been in the Arizona market. The Department of Energy notes that residential solar has been scaling since 2008, and firms that have survived that long have likely weathered the “boom‑bust” cycles and learned how to navigate local permitting quirks.U.S. Department of Energy explains the importance of experience.
Gather three detailed quotes – then dissect them
Don’t settle for the first number you get. Ask three different installers for line‑item estimates that break out:
- Panel model and wattage
- Inverter brand and warranty
- Racking system and any roof‑penetration costs
- Labor, permitting, and inspection fees
- Any “soft costs” like design or project management
When the numbers land on your desk, create a side‑by‑side table. Look for hidden fees – for example, a quote that says “system cost: $19,500” but hides a $1,200 permit charge in fine print. That’s where you can negotiate or ask for a clearer breakdown.
Ask the right questions (and listen for red flags)
During the walkthrough, pop a few of these questions:
- What’s the timeline from contract signing to “system live”?
- Do you handle all permits, or do I need to submit anything?
- How do you handle unexpected roof repairs?
- Can I see references from homeowners with a similar roof shape?
If the installer brushes off any of these, it’s a warning sign. The Energy.gov guide warns that a small subset of bad actors can slip through, so keep your ears open for vague answers.DOE’s smart‑shopping tips highlight red‑flag questions.
Crunch the incentives – don’t leave money on the table
Arizona still offers a state solar tax credit, and on top of that you’ll likely qualify for the federal Residential Clean Energy Credit, which currently covers 30% of qualified costs installed through 2032. The credit applies to the total system price **after** you subtract any rebates or utility subsidies.IRS details on the credit calculation. Here’s a quick way to factor it in:
- Take the total quoted price (including labor, permits, and equipment).
- Subtract any cash rebates you received from the installer or local utility.
- Multiply the remaining amount by 0.30 – that’s your federal credit.
- Check your state’s portal for the percentage you can claim locally (often 25% of the net cost).
For example, if your net system cost is $20,000 after a $1,500 utility rebate, the federal credit would be $5,550, dropping your out‑of‑pocket to $14,450 before state credits. Add a 25% Arizona credit and you’re looking at roughly $10,800 cash – a huge difference.
Finalize the contract with protection clauses
When you’re ready to sign, make sure the contract includes:
- A clear start‑date and completion window.
- Performance guarantees – many installers will promise a certain kWh production in the first year.
- Warranty details for panels, inverters, and workmanship.
- An “escape clause” if permitting takes longer than expected or if the roof condition worsens.
Having those clauses in black and white saves you headaches later, especially if you decide to sell the house. A well‑documented solar system can add up to $15,000 to resale value, according to multiple studies.
So, what’s the next move? Grab a notebook, call three local, NABCEP‑certified installers, and start comparing line‑item quotes. Keep your eye on the incentives calculator, and don’t forget to ask for references. When you feel the numbers line up and the installer’s vibe feels solid, you’re ready to sign and watch the sun do the heavy lifting.

Step 5: Installation Process and Timeline
Now that you’ve signed the contract and picked your panels, it’s time to watch the plan turn into a real system on your roof. The process isn’t magic—it’s a series of predictable steps that, if you know what’s coming, feels a lot less like a mystery and more like a coffee‑break conversation.
What to Expect Before the Crew Shows Up
First, your installer will do a final site visit. This isn’t just a polite “hey, we’re coming,” it’s a chance to confirm roof measurements, double‑check shading, and make sure the electrical panel can handle the new load. Most contractors schedule this within a week of signing, but if they’re busy it can stretch to a month.
During that visit they’ll also pull any required permits from the city. In Arizona the paperwork is usually straightforward, but the installer handles the forms and fees so you don’t have to chase the building department.
Pro tip: ask for a copy of the permit application. Seeing the official numbers helps you verify that everything matches the contract.
Day‑One: Mounting the Racks
When the crew arrives, the first physical task is installing the mounting brackets. Whether they use a flush‑mount or a tilted rack, the goal is to give the panels a sturdy foundation that can survive desert winds.
The brackets are bolted into the roof’s structural members, then the racking framework is adjusted to the optimal tilt—typically between 18° and 36° for Arizona homes. This angle balances maximum sun capture with a low profile that won’t look out of place on a suburban roof.
According to a step‑by‑step guide from a major solar manufacturer, the brackets are tightened with nuts and bolts to ensure long‑term durability as described in the industry guide. Once the frame is solid, the panels themselves are ready to be hoisted.
Wiring and Inverter Hook‑up
Next comes the electrical side. Each panel is connected to a MC4 connector, then the strings are wired either in series, parallel, or a hybrid layout depending on the system size. The installer will run conduit from the roof to the inverter location—usually a garage or utility closet.
The inverter is the heart of the system: it turns the DC power from the panels into the AC you use at home. The positive lead from the panel array plugs into the inverter’s positive terminal, and the negative lead goes to the inverter’s negative terminal. From there the inverter feeds the house panel and the grid disconnect.
If you’ve added a battery, the inverter also links to the battery bank, allowing you to store excess sunshine for night‑time use. Most residential setups in Arizona include a battery backup because the summer peaks can be steep.
Inspections, Grid Connection, and the “Flip‑Switch” Moment
After the hardware is in place, the local building or electrical inspector swings by for a quick check. They verify that mounting, wiring, and grounding meet code. This step can take a day or two, depending on the jurisdiction’s backlog.
Once the inspector signs off, the installer works with the utility—often Eversource in the Northeast, but in Arizona it’s your local utility—to file the interconnection application. The utility then installs a new net‑meter so they can track how much energy you send back versus pull from the grid.
The same utility timeline guide notes that a typical residential job takes one to two days to install, but scheduling the installation can stretch six to eight weeks because of permitting and crew availability as outlined by the utility’s project timeline. After the paperwork is cleared, the installer flips the main inverter switch, and you’ll see the digital display flash with your first generation numbers.
Quick Timeline Checklist
- Week 0‑2: Contract signed, installer selected.
- Week 1‑4: Final site visit, permits filed.
- Week 4‑6: Panels and racking ordered.
- Week 6‑8: Installation day – mount brackets, attach panels, run wiring.
- Week 8‑9: Inspection and utility interconnection paperwork.
- Week 9‑10: System activation, owner walkthrough.
That’s the whole arc—from paperwork to that satisfying moment when the inverter lights up. Knowing the timeline lets you plan a backyard BBQ, coordinate with any roof repairs, and keep the excitement high.
So, what’s the next move? Grab your installer’s contact, confirm the permit schedule, and set a calendar reminder for the day the crew rolls in. With the process mapped out, residential solar installation feels less like a gamble and more like a well‑orchestrated project you control.
Step 6: Maintenance, Monitoring, and Performance Optimization
Now the panels are up, the inverter is humming, and you’re probably wondering if you have to become a full‑time electrician. Good news: residential solar installation doesn’t end with the flip‑switch moment. A bit of routine care and smart monitoring keep your system humming for decades.
Quick visual check – twice a year
Mark your calendar for a spring walk and a fall walk. Look for dust, bird droppings, or any debris that might be shading a panel. A damp cloth and a soft brush are usually enough; you don’t need a pressure washer.
If you spot a cracked glass or a loose bolt, note the spot and call your installer before the next storm. Most warranties cover workmanship issues, but they won’t kick in if you ignore a problem that you could have reported.
When to clean – it’s not a daily chore
Arizona’s dry heat means panels often stay clean longer than in coastal towns. In most cases, a gentle rinse with a garden hose a few times a year does the trick. Save the soap for really stubborn residue – harsh chemicals can damage the anti‑reflective coating.
And here’s a little secret: cleaning on a cool, overcast morning prevents thermal shock. Your panels won’t crack from a sudden temperature swing, and you’ll see a clearer performance boost on the next sunny day.
Remote monitoring – let the data do the work
Most modern inverters come with a built‑in portal where you can watch real‑time production, compare day‑to‑day output, and get alerts if something looks off. The SolarEdge monitoring platform, for example, gives you a single dashboard that tracks performance, flags downtime, and even suggests troubleshooting steps via its smart tools.
Set up email or push notifications for “system offline” alerts. That way, you’ll know the moment a fuse blows or a string goes down, instead of waiting until the next bill shows a dip.
Performance optimization tips
1. Trim shading trees. A single branch that drifts over a panel in the afternoon can shave 10‑15 % off your output. Even a modest prune each year can add a few hundred kilowatt‑hours.
2. Check inverter settings. Some inverters let you adjust the maximum power point tracking (MPPT) range. If you’ve added a battery since the original install, make sure the MPPT is set to accommodate both generation and storage.
3. Review your net‑meter readings. Compare the numbers on your utility’s portal with the figures in your monitoring app. A persistent gap could indicate a wiring issue or a meter calibration problem.
Seasonal checklist
- Spring: Visual inspection, clean panels, prune trees.
- Summer: Verify inverter ventilation (dust can clog fans).
- Fall: Second visual inspection, clean if needed, review performance data.
- Winter: Check for snow buildup (in Arizona, rare, but possible in high‑altitude areas) and ensure the monitoring app still reports live data.
Does any of this feel overwhelming? It isn’t. Think of it like changing your car’s oil – a few minutes every six months and you avoid a costly breakdown later.
When to call the pros
If you notice a sudden drop of more than 20 % in daily production, or if the monitoring platform flags an error you can’t decode, schedule a service call. Most installers include a one‑year performance warranty that covers inverter swaps and electrical troubleshooting.
Finally, keep a log of any maintenance activities. A simple spreadsheet with dates, tasks, and notes becomes a handy reference when you sell the house – buyers love seeing a well‑maintained system, and it can boost resale value.
So, what’s the next step? Grab a notebook, set those two calendar reminders, and fire up your monitoring dashboard. A little attention now means you’ll keep reaping clean, cheap electricity for the next 25‑30 years.
FAQ
What are the first steps I should take before a residential solar installation?
Start by checking your roof’s orientation, tilt, and overall health – a quick visual walk with a compass app does the trick. Next, pull your past year’s electric bills so you can estimate how much electricity you actually use. With those two pieces in hand, you can run a rough system‑size calculation or use an online solar‑savings calculator to see if the numbers make sense for your home.
How long does a typical residential solar installation take from contract to activation?
Once you’ve signed a contract, most Arizona installers need about two to three weeks to finalize permits and order equipment. The actual on‑site work usually wraps up in one to two days, followed by a municipal or utility inspection that can add another week. All told, you’re looking at roughly six to eight weeks from paperwork to that satisfying moment when the inverter lights up.
What permits and inspections are required for residential solar installation in Arizona?
Arizona municipalities generally require a building permit and an electrical permit, both of which your installer should handle for you. After the hardware is up, the local building inspector will verify that the mounting, wiring, and grounding meet the state electrical code. Finally, the utility will perform an interconnection inspection before they install a net‑meter to track the energy you send back to the grid.
How much maintenance does a residential solar installation really need?
Think of it like a car oil change – a quick visual check twice a year is usually enough. Look for dust, bird droppings, or any cracked glass, and give the panels a gentle hose‑down if they’re dirty. Keep the inverter’s ventilation clear and set up alerts in the monitoring app so you’ll know immediately if production drops unexpectedly.
Can I install solar panels myself, or do I need a professional installer?
While the idea of a DIY install is tempting, most jurisdictions require a licensed electrician to handle the wiring and a certified installer to pull permits. Plus, professional installers carry insurance, warranties, and the know‑how to avoid costly roof penetrations. In short, hiring a qualified installer protects you from headaches and ensures you qualify for tax credits and rebates.
What financing options are available for residential solar installation and how do they affect my savings?
You can pay cash, take out a solar loan, or opt for a power‑purchase agreement (PPA). Cash gives you the highest lifetime savings because you capture the full federal tax credit. Loans spread the cost over 10‑20 years, but interest can trim the net benefit. PPAs require no upfront cash but you never own the system, so you miss out on the tax credit and the biggest savings.
Conclusion
So you’ve walked through everything from sizing to permits, and the day the crew rolls in is finally in sight.
Do you still feel a little nervous about that big leap? That’s normal – we all wonder if we made the right choice after months of research.
The good news? Residential solar installation is really just a series of small, predictable steps. You already know your roof can hold the panels, you’ve compared a few quotes, and you’ve crunched the numbers on incentives.
Now, focus on the two things that matter most after the hardware is up: performance monitoring and simple upkeep. Set calendar reminders for a spring and fall visual check, and enable push alerts on your inverter’s app. A quick hose‑down and a glance at the production chart will keep your system humming for decades.
Remember the Martinez family? Their extra 80 sq ft of cleared roof gave them two more panels and an extra 300 kWh a year. Small tweaks like trimming a tree branch or tightening a loose bolt can add up to real savings.
What’s the next step? Grab a pen, write down the date you expect the installer to arrive, and schedule those two maintenance reminders now. When the inverter lights up, you’ll feel the payoff instantly.
Ready to turn sunshine into savings? Give Sean Whitmer a call, and let the journey from planning to clean energy begin today.


