Picture this: you’ve just bought a sleek solar kit, the roof is sunny, and the idea of cutting your electric bill feels within arm’s reach.
But as soon as you open the box, a wave of “where do I start?” washes over you. Trust me, we’ve all been there – the excitement quickly tangled with a tangle of wires, permits, and “do‑it‑yourself” doubts.
Here’s the good news: learning how to install solar panels isn’t a PhD‑level project. With a little planning, the right tools, and a step‑by‑step mindset, you can turn that roof into a power‑generating friend.
So, why bother doing it yourself? First, you get to watch your meter spin backwards, saving you money month after month. Second, you gain the bragging rights of saying, “I helped power my home with the sun.” And third, you avoid the markup that installers often add to the same hardware.
Now imagine the moment you flip the first breaker and the lights come on, powered by your own panels. That feeling of “I did that” is what drives many homeowners to roll up their sleeves.
But before you climb onto the roof, there are a few basics you need to lock down: assessing your roof’s suitability, checking local regulations, and gathering the essential safety gear. Skipping any of these steps can turn a smooth ride into a costly detour.
Think about it this way: installing solar panels is like cooking a new recipe. You gather ingredients, follow the prep steps, keep an eye on the heat, and finally plate a dish you can be proud of.
In the sections that follow, we’ll walk through each phase – from sizing your system to wiring the inverter – in plain language, with plenty of real‑world tips you can apply today.
Don’t worry if you’re not an electrician; we’ll point out where a licensed pro is a must‑have and where a handy homeowner can safely take the lead.
Ready to demystify the process and see how to install solar panels without pulling your hair out? Let’s dive in, step by step, and turn that rooftop into a clean‑energy powerhouse.
TL;DR
Learning how to install solar panels is easier than you think—just follow our step‑by‑step guide, gather the right tools, and check permits before you climb onto the roof.
By the end you’ll have a safe, efficient system humming with clean energy, plus confidence that you saved money and avoided costly mistakes.
Step 1: Assess Your Site’s Solar Potential
Before you even think about bolting panels to the roof, you need to know if your house is a good solar candidate. It’s kind of like checking the soil before planting tomatoes – you don’t want to waste time and money on a spot that won’t grow.
First thing’s first: grab a sunny day and stand on your roof (or use a ladder if you’re not comfortable up there). Look for shade‑creating obstacles – chimneys, tall trees, neighboring roofs. If a third of your roof is constantly in shadow, you’ll need to rethink the layout or consider a ground‑mount system.
Check the roof’s orientation and tilt
In the U.S., a south‑facing roof usually captures the most sunlight. East‑ or west‑facing roofs can still work, but you’ll get a bit less energy, especially in the winter. The tilt matters, too – the sweet spot is roughly the latitude of your location. If you live at 33° N, aim for a 30‑35° tilt.
Don’t forget about roof age and material. Asphalt shingles that are less than 10 years old are ideal. Metal roofs are great because they’re lightweight and won’t need extra reinforcement.
Use a solar assessment tool
There are free online calculators where you plug in your address and get a sun‑hours estimate. I like using the Solar panel installation: A Practical Step‑by‑Step Guide as a reference – it walks you through the numbers without getting too technical.
Enter your average monthly electricity bill, the size of your home, and the tool will spit out a rough system size. This is where you’ll see if a 5 kW system makes sense or if you need to scale up.
So, what’s the next step after the math? Walk the site.
That video shows a quick visual walk‑through of a roof survey – it’s a good way to see what to look for without climbing up yourself.
Now, a quick reality check: many homeowners discover after the first roof visit that structural reinforcements are needed. If you hear creaking or notice sagging, bring in a structural engineer before you order panels.
Local climate nuances
Even within the same state, micro‑climates can change your solar yield. Coastal areas might get more cloud cover, while inland spots have clearer skies. A simple way to gauge this is to look at your utility’s net‑metering statements – they often show peak sun‑hours.
And if you’re planning to add an electric vehicle charger later, you’ll want a bit extra capacity. That’s where an EV‑focused tool like Selene – your AI‑powered EV assistant can help you size both solar and charging together.
Lastly, think about permits. Some municipalities require a shading analysis or a roof‑load calculation before they approve your permit. It’s easier to have that data on hand when you submit the application.
Planning ahead can save you weeks of back‑and‑forth with the city.

If you’re also thinking about outdoor upgrades – maybe a new pergola – you’ll want to coordinate permits. The same city office that handles solar often processes pergola permits, so checking the Pergola Permit Requirements guide can keep your projects in sync.
Bottom line: a solid site assessment is the foundation of a successful solar install. Take the time to map shade, verify orientation, run the numbers, and check local rules. When you’ve crossed those boxes, you’ll move on to sizing your system with confidence.
Step 2: Choose the Right Solar Panel Types
Now that you’ve scoped out your roof’s sun exposure, the next big decision is what kind of panel actually sits on those rafters. It feels like a “which ice cream flavor?” moment, but the choice can swing your energy output, budget, and even the look of your home.
Monocrystalline – the high‑efficiency heavyweight
Monocrystalline panels are made from a single silicon crystal, which gives electrons more room to flow. The result? Efficiencies that often top 20 % and can push above 23 % on premium models. Because they pack more power per square foot, you need fewer panels to hit your target kWh. That’s a win if your roof is cramped or you’re eyeing a sleek, all‑black aesthetic.
Sure, the price tag is higher. EnergySage notes that monocrystalline panels “usually come at a higher price” but the extra cost can be offset by the smaller footprint and higher energy yield according to EnergySage. A homeowner in Phoenix with a 1,200 sq ft roof chose mono panels and ended up needing only eight modules instead of twelve, saving on racking hardware.
Polycrystalline – the budget‑friendly contender
Polycrystalline panels are built from multiple silicon fragments melted together. The manufacturing process is simpler, so the panels tend to be blue‑tinged and a few points less efficient—usually under 20 %.
That efficiency gap means you’ll need more panels to generate the same electricity. If you have a sprawling south‑facing roof, that extra space is rarely an issue. Plus, the lower upfront cost can make a big dent in your total project budget.
For example, a family in Dallas with a 2,500 sq ft roof opted for poly panels because they could afford a larger array that still met their monthly usage. They saved a few thousand dollars up front and are happy with the performance, especially since their climate isn’t scorching hot.
How to match panel type to your situation
Step 1: Measure your usable roof area. Subtract any shaded zones you identified in Step 1.
Step 2: Calculate your target system size based on your electricity bill (you already did that). Then divide the desired wattage by the typical output of each panel type. Roughly 350 W per mono panel vs. 300 W per poly panel is a good rule of thumb.
Step 3: Plug the numbers into a quick spreadsheet. If the total panel count for poly exceeds the available space, swing back to mono—even if it costs a bit more.
Step 4: Factor in temperature coefficient. Monocrystalline panels handle heat a little better, losing less power as temperatures climb. If you live in a hot climate, that edge can translate into noticeable savings over the 25‑year lifespan.
Step 5: Check warranty and degradation rates. Both types typically come with 25‑year performance guarantees, but monocrystalline often degrades slower (<1 % per year) while poly may sit closer to 1 %‑1.5 % according to Forbes. If you’re planning to stay in the house for decades, that slower degradation can add up.
And don’t forget aesthetics. A uniform black array can blend nicely with darker roofing materials, while a blue‑hued poly array can add a subtle contrast that some homeowners actually prefer.
So, which panel feels right for you? Ask yourself: Do I have limited space? Am I okay paying a bit more now for long‑term efficiency? Or do I have a big, sunny roof and need to keep the initial cost low?
After you’ve settled on a panel type, the next step is sizing your inverter and planning the mounting system. Those details will determine how cleanly your panels feed power into your home’s electrical panel.
Step 3: Calculate System Size & Budget
Okay, you’ve picked mono or poly panels, and the roof looks good. Now you’re probably wondering, “How many panels do I actually need, and will my wallet survive the math?” Trust me, we’ve all stared at those spreadsheets and felt a little panic. Let’s break it down together, step by step.
First, grab your latest utility bill and figure out your average daily usage in kilowatt‑hours (kWh). If you use about 30 kWh a day, that translates to roughly 11 kW of solar capacity in a sunny climate (you’ll need a bit more in cooler spots). A quick rule of thumb: multiply your daily kWh by 1.2 to account for losses and seasonal swings.
So, you’re looking at an 11‑kW system? Great. Next, decide how many watts each panel will deliver. A typical 350‑W mono panel gives you about 31 panels for 11 kW, while a 300‑W poly panel would push you up to 37 panels. That’s where the roof‑space check from Step 1 comes back into play.
Here’s a quick way to visualize it:
| Factor | Typical Value | Budget Impact |
|---|---|---|
| System Size (kW) | 10‑12 kW for most homes | Core driver of total cost |
| Panel Wattage | 300‑350 W per module | Higher wattage = fewer panels, lower racking cost |
| Cost per Watt | $2.50‑$3.00/W (average) | Directly scales hardware spend |
Now let’s talk dollars. The national average sits around $2.53 per watt before incentives. Multiply that by your 11 kW and you’re looking at roughly $27,800 for the hardware alone. Remember, panels are just about 12 % of the total install cost; the rest comes from inverters, mounting, wiring, and labor.
Quick example: 11 kW × $2.53/W = $27,830 for panels and inverters. Add roughly 30 % for mounting hardware, permits, and labor (about $8,350) and you land near $36,200 total. That number feels big, but most homeowners recoup $37,000‑$148,000 over a 25‑year lifespan, so the math starts to look friendly fast.
Don’t forget the hidden but predictable extras: a new 200‑amp electrical panel ($2,000‑$3,000), interconnection fees ($500‑$1,000), and any roof‑reinforcement work if your shingles are aging. Those line items can add another 5‑10 % to the bill.
So, how do you keep the budget from spiraling? Start by pulling at least three quotes from reputable installers. Competition drives down the $/W price, and you’ll see a spread of options—from a no‑upfront‑cash purchase to zero‑down loans that let you start saving from day one. Most financing packages are structured so the monthly payment is lower than your current electric bill.
And if you’re still uneasy about the upfront hit, consider a solar loan with a short term (5‑7 years). The interest is usually low, and because you own the system, every kilowatt‑hour generated is pure profit after the loan is paid off.
Bottom line: calculate your daily usage, pick a panel wattage that fits your roof, multiply by the current $/W rate, and then pad the total with 30‑40 % for soft costs. That gives you a realistic budget you can compare against available federal tax credits and state rebates.
Ready to see the numbers for your zip code? Plug your address into a free solar quote tool and watch the estimate drop as incentives pop in. It’s a satisfying moment—like finding a hidden discount on a big purchase. From there, you can decide whether to go all‑cash, finance, or lease, and you’ll have a clear picture of when the system will start paying you back.
Step 4: Obtain Permits & Hire Installers
Okay, you’ve sized your system and figured out the budget. The next hurdle feels a lot like waiting in line at the DMV—except this line actually protects your house and the grid. That’s why getting the right permits and a trustworthy installer is a non‑negotiable part of learning how to install solar panels.
What permits do you really need?
Most towns treat a solar install just like any other construction or electrical project. In Massachusetts, for example, you’ll typically need a building permit, an electrical permit, and a separate interconnection approval before the utility will let you feed power back onto the grid according to Boston Solar’s permitting guide. The exact forms vary by municipality, and historic districts or HOA‑controlled neighborhoods can add extra layers of review.
Ground‑mounted arrays bring zoning and land‑use checks into the mix, while rooftop systems usually stay within the building‑permit realm. If you’re going off‑grid, you can skip the interconnection step, but you’ll still need to prove the electrical work meets code.
Gather the paperwork before you call a pro
Think of permits as a recipe: you need the right ingredients before you can start cooking. Here’s a quick checklist you can print out:
- Site plan showing panel layout, setbacks, and roof slope.
- Structural calculations if your roof is older than 10 years.
- Electrical one‑line diagram with inverter specs.
- Proof of ownership or landlord consent.
- Any HOA or historic district approval letters.
Having these ready cuts the back‑and‑forth with the permitting office and shows installers you’re serious.
How to pick an installer you can trust
Now comes the “who do I let on my roof?” question. Look for a licensed electrician who also holds a solar contractor’s certificate. In many states, a “C‑10” or “C‑46” license is a good sign they’ve passed the electrical code exam.
Ask for at least three detailed quotes. The cheap one often skips the permit‑pulling service, which can leave you holding the bag later. A solid installer will bundle the permit fees, schedule the municipal inspections, and even attend the final utility walkthrough.
Don’t forget to check reviews that mention “permit” or “inspection” – those stories reveal whether the installer actually follows through or disappears once the paperwork starts.
Timing is everything
Permit approvals can take anywhere from a week to a month, depending on how busy your town’s planning office is. If your system is larger than 15 kW, expect a longer review because the city may want a deeper structural analysis.
While you wait, keep the momentum by ordering your panels, racking, and inverter. Most installers will place a provisional order so the hardware arrives just as the permit gets the green light.
Pro tip: schedule the electrical inspection for the same day you’re ready to do the final interconnection check. That way you won’t have to scramble to re‑mount panels if the inspector finds a minor issue.
Final checklist before you sign the contract
1. Does the quote list every permit fee separately?
2. Is the installer listed as the “responsible party” on the permit application?
3. Have they confirmed the utility’s interconnection requirements?
4. Will they provide a copy of the completed permit package after approval?
5. Is there a clear warranty on both labor and equipment?
Cross‑checking these items saves you from surprise costs and ensures the project moves smoothly from paperwork to power.
Once the permits are stamped and the installer’s crew shows up, you’re officially in the “installation” phase. The next step will be mounting the racking, but that’s a story for the following section.
Take a deep breath—you’ve just cleared one of the biggest roadblocks. With the right permits in hand and a vetted installer on board, the sun’s only limit is how fast you can get those panels up.

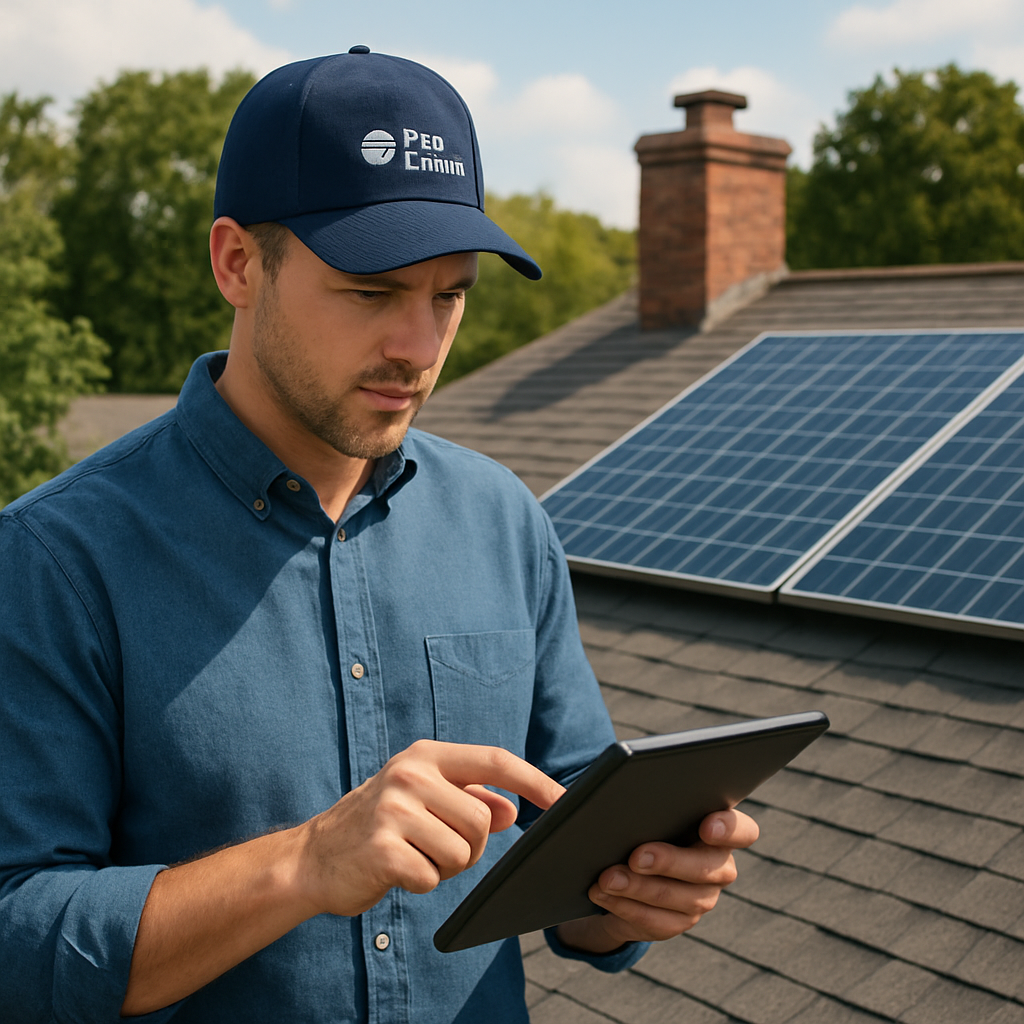
Step 5: Install the Panels Safely
Okay, the permits are in, the crew is on site, and the rack is waiting to become a sturdy backbone. Now it’s time to actually get those shiny panels up there – and do it without a single scratch.
Gather your safety gear
Before you even lift a panel, suit up. A sturdy harness, a non‑slip ladder, and a hard hat are non‑negotiable. A pair of insulated gloves and safety glasses keep your hands and eyes protected while you’re handling live wires.
The GoGreenSolar guide reminds DIYers that “working on a DIY solar installation means dealing with electricity, climbing on roofs… it’s important to have the appropriate safety equipment to protect yourself and prevent accidents” according to their safety checklist. Add a fall‑arrest line if your roof pitches steeply, and keep a fire‑extinguisher within arm’s reach – you’ll thank yourself later.
Mark and secure the racking
First, locate the roof rafters. If you can’t see them from the outside, pop up into the attic and measure the spacing, then draw a chalk line on the roof deck. That line becomes your guide for where the flashings and rails will sit.
Snap the flashing into place with the pre‑drilled holes, then bolt the mounting rails to the flashing. Tighten each bolt to the manufacturer’s torque spec – overtightening can crack the flashing, undertightening can let the rail shift under wind load.
Give each rail a quick wiggle test; it should feel rock‑solid, not like a loose shelf.
Attach the panels
Now the fun part: lifting the panels. Have a buddy hold the bottom edge while you guide the top into the rail clamps. Most kits use four‑point clamps that snap shut with a quarter‑turn. Don’t rush – a misaligned panel can stress the frame and reduce output.
When you’re working on a tile roof, slide a thin piece of plywood under the panel to distribute weight and avoid cracking tiles. For a shingle roof, use a rubber pad between the clamp and the shingle to keep the seal intact.
After the panel is seated, lock the clamps, then repeat the process across the row. Keep the panel orientation consistent – the manufacturer’s label usually shows the front (sun‑facing) side.
Double‑check connections and seal
Before you step down from the roof, run a quick visual audit. All DC cables should run through a conduit or protective sleeve, and the connectors must be tightened to the recommended torque.
If you’re using micro‑inverters, they’re already bolted to the back of the panel. For a string inverter, bundle the strings in a junction box and seal the box with a weather‑rated gasket.
Apply a bead of UV‑stable silicone around every flash‑point where the rail meets the roof. This prevents water intrusion that could corrode the mounting hardware years down the line.
Final inspection checklist
Grab a clipboard and run through this quick list:
- All safety harnesses removed and stored.
- Racking bolts torqued, rails level, and flashings sealed.
- Panel clamps locked, panels oriented correctly, and no visible gaps.
- DC wiring routed through conduit, connectors tight, and grounding strap attached.
- Inverter location accessible and ventilation adequate.
- Roof penetrations capped with flashing and sealed.
If anything looks off, pause and fix it now. Remember, the inspector will be looking for exactly these details.
Once you’ve ticked every box, step back and admire the array. That feeling of panels humming in the sun? It’s the payoff for a careful, safe install. Next up, we’ll wire the inverter and get your system talking to the grid – but that’s a story for the following step.
Conclusion
We’ve walked you through every step of how to install solar panels, from sizing the system to the final safety check.
By now you’ve seen why a solid site assessment saves you headaches, how choosing the right panel type can fit your roof and budget, and the importance of pulling the right permits before the first bolt is tightened.
Remember the checklist: measure sun exposure, verify roof strength, lock down permits, pick a reputable installer, then follow the mounting and wiring guide with safety gear on hand.
What’s the biggest payoff? Seeing those panels humming in the sun and watching your electric bill shrink month after month – that feeling of “I built this” is worth every careful step.
If you’re ready to turn the plan into reality, grab your notes, call a licensed installer, and schedule that first roof visit. A quick call to Pep Energy can get you a free site review and a clear quote.
So, take the momentum you’ve built here, double‑check your checklist, and let the sun do the heavy lifting. Your clean‑energy future starts the moment you decide to act.
Need help fine‑tuning your design? Our team at Pep Energy is happy to walk you through any lingering questions and keep the process smooth from start to finish.
FAQ
What’s the first thing I should check before I even think about mounting panels?
Start with a quick sun‑exposure audit. Grab a notebook, sketch your roof’s outline, and note which sides face south, east, or west. Walk the roof (safely) and look for shadows from trees, chimneys, or neighboring houses. If a big oak blocks the afternoon sun, you’ll lose a chunk of production – trimming or repositioning can boost output dramatically.
Do I really need a licensed electrician for every part of the install?
Yes, for the electrical side you’ll want a licensed pro. They’ll handle the inverter hookup, the main disconnect, and the utility interconnection permit. DIY‑friendly steps like racking and panel placement are fine for handy homeowners, but the code‑required wiring must be inspected. Skipping a licensed electrician can void warranties and cause costly re‑work later.
How can I tell if my roof can actually support the weight of solar panels?
Old roofs often need a structural check. Panels weigh about 2–3 lb per square foot, so a typical 6 kW system adds a few hundred pounds spread across the roof. If your roof is over ten years old, have a contractor inspect the decking for sagging or water damage. Reinforcing joists or adding blocking is cheap compared to replacing panels after a failure.
What permits do I need, and how long does the approval process usually take?
Most municipalities require a building permit, an electrical permit, and an interconnection approval from the utility. The paperwork varies, but a good rule of thumb is to budget one to four weeks for review. While you wait, order the panels and racking so they arrive right when the permit is signed off – that keeps the project moving without idle downtime.
Can I install the system myself and still qualify for the federal tax credit?
The 30% Investment Tax Credit (ITC) is available whether you DIY or hire a pro, as long as the system meets all local codes and is inspected. However, the paperwork gets smoother if a licensed installer files the final paperwork for you. Keep every receipt, permit copy, and inspection report – the IRS will want proof that the system is “qualified residential solar.”
How do I choose between micro‑inverters and a single string inverter?
Micro‑inverters sit on each panel and convert DC to AC right at the source, which helps if you have shading issues or a mixed‑orientation roof. A single string inverter is cheaper and works well on a uniform, unshaded array. If you’re unsure, start with a string inverter and upgrade later; the extra cost of micro‑inverters usually pays off only when you need panel‑level optimization.
What’s the best way to maintain my panels after the install?
Cleaning twice a year is usually enough – a gentle rinse with a garden hose and a soft brush removes most dust and bird droppings. Schedule a visual inspection after major storms to check for loose bolts or cracked seals. Most warranties last 25 years, but a quick yearly check can catch corrosion early and keep performance humming.


