Ever stared at your electric bill and thought, ‘There’s got to be a better way?’ You’re not alone—many homeowners and business owners feel that tug of frustration every month, wondering if solar could actually save them money.
The first question that pops up is usually the same for everyone: How much do solar panels cost? It’s a simple question with a surprisingly complex answer, because costs shift with system size, roof type, local incentives, and whether you buy, lease, or finance.
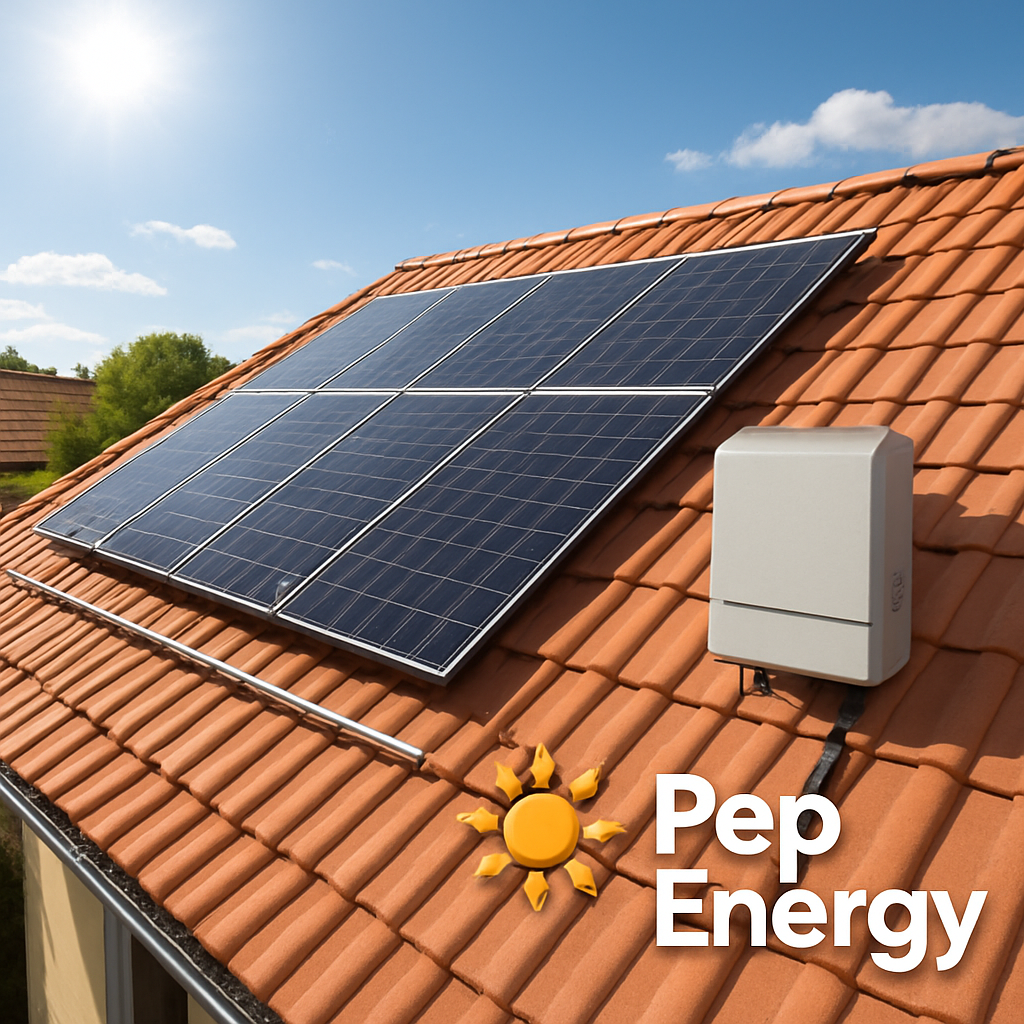
In our experience at Pep Energy, we’ve seen a 5‑kW residential system—big enough to cover most of a typical home’s electricity—run anywhere from $12,000 to $18,000 before any tax credits. After the federal 30% investment tax credit, that bracket drops to roughly $8,400‑$12,600, which feels a lot more doable.
But if you’re a small business with a larger roof, the numbers stretch. A 20‑kW commercial array can cost between $45,000 and $70,000 pre‑credit, and the savings start to show up in the first year once you factor in reduced utility rates and possible demand‑charge reductions.
And don’t forget the hidden variables: the angle of your roof, shading from nearby trees, and the quality of the inverter can all push the price up or down a few thousand dollars. That’s why a solid site assessment—something we always do before quoting—makes the difference between a realistic estimate and a surprise later on.
So, what does all this mean for you? It means the headline price you see online is just the starting point. The real cost will depend on your specific roof, energy usage, and the financing path you choose—whether you buy outright, lease for a low‑upfront option, or spread payments with a solar loan.
In the next sections we’ll break down each component—panels, inverters, racking, and labor—so you can see exactly where every dollar goes and how to trim the fat without sacrificing performance. Ready to demystify the numbers? Let’s dive in.
TL;DR
If you’re wondering how much do solar panels cost, residential systems start around $12,000 before the 30% tax credit, while commercial arrays range $45,000‑$70,000, with prices shifting based on roof size, shading and equipment.
Our guide breaks down panels, inverters, racking and labor so you can spot savings, compare leasing versus financing, and choose the right path for your home or business.
Understanding the Components that Influence Solar Panel Prices
When you ask yourself, “How much do solar panels cost?”, the answer usually hides behind a handful of moving parts. It’s not just the price tag on the glass‑covered cells – it’s the whole system dancing together. Let’s pull back the curtain and see what really drives the numbers.
Solar panel modules
The panel itself is the star, but even stars come in different flavors. Monocrystalline cells tend to fetch a premium because they’re more efficient, while polycrystalline panels are a bit cheaper but need more roof space to hit the same output. In our experience, a 300‑watt monocrystalline module can run $180‑$220, whereas a comparable poly panel might sit around $150‑$180. That $30‑$70 difference per panel adds up fast on a 20‑panel residential system.
And then there’s the brand reputation factor. A well‑known manufacturer often includes a longer warranty, which can feel worth the extra few dollars. If you’re chasing the lowest upfront cost, you might consider a newer, lesser‑known brand – just be sure they’ve got a solid performance history.
Inverter choice
Think of the inverter as the translator between your sunny roof and the grid. String inverters are the most common and usually the cheapest option, but if you have a complex roof layout or shading issues, a micro‑inverter or power‑optimiser can boost production – at a cost premium of $100‑$200 per unit. That’s another line‑item that can swing the total bill.
We’ve seen a small business with a partially shaded roof save $2,000 over five years by opting for micro‑inverters, even though the upfront price was $1,500 higher. It’s a classic case of paying more now to earn more later.
Mounting and racking
Racking might sound like a boring, mechanical detail, but it’s where the rubber meets the road. A simple rooftop rail system can cost $30‑$50 per panel, while a custom‑engineered tilt or ballasted system for a flat roof can climb to $80‑$120 per panel. The difference often reflects the extra engineering and labor needed to keep the array safe in high winds.
Here’s a quick tip: if you’re already planning a roof repair or replacement, coordinate the solar mounting with that job. You can shave off up to 15% of the racking cost because the crew is already up there.
Labor and permitting
Labor is where geography really bites. In a city with high labor rates, you might see installation fees of $1.20‑$1.50 per watt, whereas in a lower‑cost market it could dip to $0.80‑$1.00 per watt. Permitting adds another layer – some municipalities charge flat fees, others have per‑panel fees. That’s why you’ll often hear us say, “Don’t forget the permit fee when you budget.”
In fact, a quick look at a nearby pergola permit guide showed that even non‑solar exterior projects can have surprising permit costs. Understanding Pergola Permit Requirements is a good reminder that any roof‑mounted upgrade, solar included, may need a permit and an inspection.
And while you’re thinking about the roof, consider energy‑saving upgrades that complement solar. Adding thermal curtains for patio doors can cut your cooling load, meaning you might get by with a slightly smaller (and cheaper) solar array.
Now, let’s bring it all together with a visual snapshot of how these pieces fit.
Notice how the video walks through a real‑world install, pointing out the panel layout, inverter location, and mounting style. It’s a handy way to see the cost drivers in action.
Want a deeper dive into choosing the right panels for your home? Check out our practical guide to solar panels for home – it breaks down efficiency, warranties, and price ranges in plain language.
Finally, here’s a quick checklist you can run through before you get a quote:
- Panel type (mono vs poly)
- Inverter style (string, micro, optimizer)
- Racking system needed for your roof pitch
- Estimated labor rates in your area
- Permitting fees and any local impact fees
Cross‑checking each of these items will give you a clearer picture of “how much do solar panels cost” for your specific situation, and help you spot where you can trim the fat without sacrificing performance.

Factors Affecting Installation Costs
When you finally ask yourself “How much do solar panels cost?” the answer usually hinges on a handful of hidden variables rather than just the price tag on a box of panels.
First, the size of the system you need is driven by your actual electricity use, not the square footage of your house. A 5‑kW system for a modest‑usage home might be enough, while a family that charges two EVs could need 10‑kW or more. That jump in kilowatts directly multiplies the hardware and labor bill.
Second, the type of panels matters. High‑power, black‑backed modules can pack 400‑600 watts into the same footprint, but they typically cost $0.30‑$0.50 more per watt than standard 340‑watt panels. If curb appeal is a priority, that extra cost might be worth it; if you’re purely after ROI, the cheaper option often makes sense.
Third, the inverter choice can swing the price by a few thousand dollars. String inverters are the workhorse and usually the cheapest. Micro‑inverters or power optimizers add $1‑$2 per watt, but they can rescue performance on partially shaded roofs.
Roof complexity and mounting style
Every ridge, dormer, and skylight adds a line item. A simple, south‑facing sloped roof might need only a few rows of rails, keeping hardware around $800‑$1,200 for a 5‑kW job. Throw in a multi‑plane roof with valleys and you could be looking at an extra $2,000‑$4,000 for custom brackets, flashing, and longer wiring runs.
Materials also change with roof type. Shingle roofs use flashing, metal roofs bolt directly to the standing seams, and flat roofs often require ballast racks that sit on concrete blocks. Those differences can add $500‑$1,500 to the total, especially if a structural engineer’s sign‑off is needed.
Location, labor rates, and permitting
Labor is a big piece of the puzzle. In states with higher wages or stricter licensing—think New England or California—installers charge $2.70‑$3.20 per watt for labor and overhead. In the Southwest, you might see $2.20‑$2.60 per watt because the market is more competitive and the installation is often less complex.
Permits and inspection fees are another “soft cost.” A city like Denver may charge $1,200 for permits and plan review, while a rural county might be under $500. If your utility requires a transformer upgrade or a dedicated meter, that can add another $1,000‑$3,000.
Seeing all these pieces together can feel overwhelming, but a quick visual walkthrough helps. Below is a short video that breaks down each cost driver in plain language.
After the video, you’ll notice the biggest surprise for many homeowners: the interconnection distance. If your panel array sits on the far side of the property, you’ll need longer conduit runs and larger gauge wire, which can add $0.10‑$0.20 per watt.
Real‑world examples
Take a 6‑kW system on a suburban Ranch‑style home in Arizona. The sunny climate keeps the $/W low—about $2.07 per watt before incentives. With a string inverter, standard panels, and a simple roof, the total install landed around $12,500.
Now look at a 7‑kW system on a historic Cape‑Cod home in Maine. The roof has three different pitches, a few dormers, and an old slate covering that needs extra flashing. Labor runs $3.00 per watt, permitting is $1,300, and the custom mounting adds $3,000. The final bill before the federal ITC was roughly $21,000.
Both examples illustrate how geography, roof geometry, and equipment choices stack up. The Arizona job saved about $8.5 k simply because the roof was straightforward and labor rates were lower.
So, how can you keep the cost under control?
- Ask for a detailed $/W breakdown in every quote—look for separate line items for panels, inverter, racking, labor, and permits.
- Map your roof in a free online tool (many manufacturers offer a sketch‑out) to spot shading early. If shade is minimal, stick with a string inverter.
- Consider a slightly larger system. The per‑watt price often drops 5‑10% when you move from 5 kW to 7 kW because the fixed costs are spread out.
- Check state and local incentives before you sign. Paradise Solar Energy notes that the average residential system in 2025 fell to $2‑$3 per watt after applying the 30% federal tax credit and local rebates.
- Plan for future battery storage now. Choosing an inverter with a higher DC rating costs a few hundred dollars upfront but avoids a costly upgrade later.
Finally, remember that the cheapest quote isn’t always the best. A company that rushes permitting or skips proper flashing can cost you time, money, and headaches down the road.
By breaking down each factor—system size, panel type, inverter, roof layout, labor rates, permits, and distance to the grid—you can turn the vague question “How much do solar panels cost?” into a clear, actionable budget.
Video: How Solar Panel Pricing Is Determined
When you hit play on a pricing walkthrough, the first thing you notice is how many moving parts there are. It’s not just a single number you can copy‑paste from a flyer. The video pulls apart every ingredient that ends up in the final “How much do solar panels cost” figure.
Why the price isn’t a flat $/W
Think of the cost like a recipe. You start with the base ingredient – the panels themselves – but then you add seasoning: the inverter, the racking, the labor, permits, and even the distance your wiring has to travel. Each of those adds a slice of cost that can swing the total up or down by a few thousand dollars.
In the clip, we see a simple 5‑kW residential system broken down. The panels might be $1,200, the inverter $1,000, mounting hardware $800, labor $2,500, and permits $400. Add a little margin for the installer, and you’re already near $5,900 before any tax credit.
How the video shows size matters
One of the biggest eye‑openers is the economies‑of‑scale curve. When you bump a system from 5 kW to 7 kW, the per‑watt price often drops 5‑10%. The video uses a side‑by‑side graphic: a 5 kW job at $2.40/W versus a 7 kW job at $2.15/W. That difference is mostly because the fixed costs – permits, design, travel – get spread over more watts.
So, if you’re on the fence about adding a couple extra panels now, the video makes a solid case: the extra upfront spend can shave $300‑$600 off the $/W number.
What the video says about roof complexity
Ever looked at a roof and thought, “That’s a nightmare for installers”? The video walks you through three roof scenarios: a single‑slope, a multi‑plane with dormers, and a flat commercial roof. Each adds a line item for custom brackets, extra flashing, or ballast. For a multi‑plane roof, you might see $2,000‑$3,500 in extra hardware and labor.
That’s why the same 6 kW system can cost $12,500 in Arizona (simple south‑facing roof) and $20,000 in Maine (complex historic roof). The video ties those numbers back to the core question – how much do solar panels cost? – by showing exactly where the variation comes from.
Incentives and the “real” price
One of the most confusing parts for homeowners is the difference between sticker price and net price after incentives. The video pauses to explain the federal 30% Investment Tax Credit (ITC) and then drops into a quick state‑by‑state snapshot. For Arizona, the ITC plus a typical rebate shaves roughly $4,000 off a 6 kW install. In Maine, the same credits might only save $2,500 because local rebates are smaller.
We also get a quick tip: always ask for a $/W breakdown *after* incentives. That number tells you the actual cash outlay you’ll face.
Practical takeaways you can use right now
Here’s the checklist the video ends on, and it’s worth writing down:
- Ask for a line‑item quote that separates panels, inverter, racking, labor, and permits.
- Map your roof yourself using a free online tool – the video shows a screenshot of a popular manufacturer’s sketch‑out.
- Consider a slightly larger system to lower the $/W.
- Factor in local incentives *after* the base price.
- Don’t forget future battery storage – a higher‑capacity inverter now can save you a few hundred dollars later.
When you watch the video with these points in mind, the mystery around “How much do solar panels cost” starts to dissolve. You’ll see that the price is a combination of hardware, labor, location, and incentives, not a mysterious number pulled out of thin air.
And if you want a deeper dive into the technology that makes all of this possible – how solar cells turn sunlight into electricity, what an inverter actually does, and why mounting matters – check out this handy guide on how solar panels work. It lines up nicely with the pricing concepts the video explores.
Comparing Solar Panel Types and Their Costs
When you start shopping for a system, the first thing that trips you up is the endless list of panel “types.”
Do you go for the sleek black monocrystalline cells that promise the highest output, or do you settle for the more budget‑friendly polycrystalline modules that look a bit speckled?
Let’s break it down so you can see exactly how each choice nudges your total bill up or down.
Monocrystalline – the efficiency champion
Monocrystalline panels are cut from a single crystal of silicon, which is why you see that uniform black look.
They typically deliver 18 %–22 % efficiency, meaning you get more watts per square foot – a real win if your roof is small or shaded.
Because the crystal is pure, the annual degradation is low, usually 0.3 %–0.5 % per year, so the power you paid for today will still be close to that number a decade from now.
Polycrystalline – the cost‑conscious alternative
Polycrystalline panels are made by letting many silicon crystals grow together, which gives them that mottled blue‑gray appearance.
Their efficiency sits a little lower, around 15 %–17 %, so you need a bit more roof space to hit the same kilowatt output.
On the plus side, the per‑watt price is typically 0.70 – 1.00 USD, compared with 0.90 – 1.20 USD for monocrystalline, according to a recent industry briefing on panel pricing differences.
Thin‑film – the niche player
Thin‑film technologies (like CdTe or CIGS) are even lighter and can perform better in hot climates, but they usually lag behind at 10 %–13 % efficiency.
Their price per watt can be competitive in large utility projects, yet for most residential roofs the extra area required makes them a less attractive option.
So, which one should you pick?
If you’re dealing with a compact roof, a higher‑efficiency monocrystalline panel often saves you money in the long run because you avoid costly structural upgrades.
If space is plentiful and you’re looking to shave a few hundred dollars off the hardware, polycrystalline might be the sweet spot.
What the numbers really mean for your wallet
The raw panel cost is only a slice of the total install price. Labor, permitting, inverters, mounting, and a handful of soft costs usually add 30 %–50 % on top of the hardware.
That said, the $/W difference between the two silicon types can shift the overall project cost by $500‑$1,500 on a typical 5 kW residential system.
And remember: the higher efficiency of monocrystalline can translate into a smaller racking system, fewer mounting brackets, and sometimes lower labor fees.
| Panel Type | Typical Cost (USD/W) | Efficiency Range | Annual Degradation |
|---|---|---|---|
| Monocrystalline | 0.90 – 1.20 | 18 %–22 % | 0.3 %–0.5 % |
| Polycrystalline | 0.70 – 1.00 | 15 %–17 % | 0.5 %–0.8 % |
| Thin‑film | ≈0.80 – 1.10 (large‑scale) | 10 %–13 % | ≈0.6 %–1.0 % |
Beyond the per‑watt price, think about the “system‑level” cost. A higher‑efficiency panel can reduce the number of inverters you need, which often cost $1,000‑$2,000 each.
It also means fewer roof penetrations – a hidden labor saving that most homeowners overlook.
One more factor: climate. In hot, sunny regions like Arizona or Southern California, monocrystalline’s lower temperature coefficient (about –0.34 %/°C) keeps output higher on blistering days.
In cooler, cloudy areas, the gap narrows, and polycrystalline’s slightly higher temperature tolerance can make sense.
Bottom line: match the panel to your roof size, climate, and budget. If you’re tight on space and want the best long‑term performance, monocrystalline usually wins.
If you have ample roof real estate and need to keep upfront costs down, polycrystalline delivers solid value.
And if you’re curious about where global solar PV costs are heading, the International Renewable Energy Agency tracks average installed costs worldwide – a useful benchmark when you compare quotes in their cost analysis report.
Now that you’ve seen the trade‑offs, you can ask your installer for a side‑by‑side quote that breaks out the panel cost, the total system price, and the projected energy production. That’s the fastest way to see which option truly saves you money.
Estimating Your Total Solar System Cost
Ever looked at a quote and thought, “How much do solar panels cost?” only to realize that number is just the tip of the iceberg? That feeling’s normal – the real price lives in a bundle of hardware, labor, and hidden fees.
In our experience at Pep Energy, the first thing we do is pull the numbers apart so you can see exactly where every dollar is going. It’s a little like opening a pizza box and counting the slices before you start eating.
Breaking Down the Cost Components
Panels. The modules themselves usually make up 12‑20% of the total bill. A 5‑kW residential system might have $1,600‑$2,200 in panel costs, depending on whether you choose monocrystalline or polycrystalline.
Inverters. Converting DC to AC adds another chunk – $1,000‑$2,500 for a string inverter, more if you go micro‑inverters. This piece can swing the $/W number by a few cents.
Racking & mounting. Aluminum rails, brackets, and flashings aren’t free. Expect $800‑$1,500 for a simple sloped roof, but add $2,000‑$4,000 if your roof has multiple planes or a metal surface.
Labor. Installers charge roughly $2.20‑$3.20 per watt for labor, permitting, and overhead. That means a 6‑kW job could see $13,200‑$19,200 in labor alone. According to NREL’s cost‑benchmarking data, labor typically accounts for about 5‑6% of the total system cost once you factor in all soft costs.
Soft costs. Permits, inspection fees, interconnection charges, and even customer acquisition fees can add another 5‑10% on top. A city like Denver might tack on $1,200 in permits, while a rural county could be under $500.
Putting It All Together
Here’s a quick mental model: start with the hardware price‑per‑watt (often $2.50‑$3.00/W for residential installs), then add labor (≈5‑6% of total) and soft costs (≈5‑10%). Multiply the system size in watts by the combined $/W to get a ballpark total.
For example, a 5‑kW rooftop in Phoenix might look like this:
- Panels & inverter: $2,800
- Racking: $1,000
- Labor (5%): $1,250
- Soft costs (8%): $2,000
Total ≈ $7,050 before incentives – which lines up with the $2.07/W figure we often see in sunny states.
Contrast that with a 7‑kW system on a historic Cape‑Cod home in Maine. Higher labor rates, complex mounting, and higher permitting push the cost toward $21,000 before the 30% federal tax credit.
If you want a faster way to see the numbers for your address, try Solar.com’s cost calculator. Plug in your system size, location, and roof type, and it’ll spit out a rough estimate that you can compare against any quotes you receive.

Quick Checklist for a Real‑World Estimate
- Ask the installer for a line‑item quote that separates panels, inverter, racking, labor, and permits.
- Confirm the $/W figure for hardware – it should reflect the specific panel efficiency you’ve chosen.
- Factor in local soft costs: permits, inspection, and any required utility upgrades.
- Apply the 30% federal Investment Tax Credit (ITC) and any state rebates to see the net out‑of‑pocket amount.
- Run the same numbers through an online calculator (like Solar.com) to verify the installer’s math.
When you walk away with a clear, itemized total, the question “How much do solar panels cost?” becomes less intimidating and more actionable. You’ll know whether you’re paying for premium hardware, extra labor, or simply navigating a tricky permitting process. And that knowledge puts you in the driver’s seat to negotiate the best possible deal.
Bottom line: the total system cost is a sum of many parts, but with a simple spreadsheet or a trusted calculator, you can demystify it, compare quotes confidently, and move forward with a solar solution that fits your budget and goals.
Financing Options and Incentives to Reduce Costs
When the sticker price of a solar system feels steep, the first thought is usually “How much do solar panels cost after everything?” The good news is that financing and incentives can slice that number in half, sometimes even more.
Federal Investment Tax Credit (ITC)
The ITC is the biggest lever we see homeowners pull. Right now it’s a flat 30 % credit on the total installed cost, no matter if you’re a single‑family homeowner or a small business. That means a $20,000 install drops to $14,000 after the credit. It’s not a rebate you wait for – you claim it on your tax return, so you need enough tax liability to capture the full amount.
One tip we always share: if you’re close to the end of the year and expect a larger tax bill next year, you can “carry forward” unused credit for up to five years. That keeps the benefit alive even if your current tax bill is low.
State and Local Rebates
Every state has its own flavor of cash‑back programs, and many utilities add extra sweeteners. In Arizona, for example, the state rebate can shave another $1,000‑$2,000 off a 5‑kW system. In Colorado, some utility companies offer performance‑based incentives that pay you a few cents per kilowatt‑hour for the first ten years.
Because these programs change yearly, we always recommend checking the Database of State Incentives for Renewables (DSIRE) or asking your installer for the latest local offers.
Solar Loans – Spreading the Cost
If you’d rather not wait for a tax refund, a solar loan lets you front‑load the ITC and pay it back over time. Most lenders offer terms from 5 to 20 years with interest rates that sit between 3 % and 6 % – often lower than a typical credit‑card or personal loan.
Here’s a quick scenario: a $18,000 system after the ITC, financed over 10 years at 4 % interest, works out to about $184 a month. Compare that to a $150‑$200 monthly electric bill, and you can break even in 5‑7 years while still saving on each bill.
Things to watch for
- Make sure the loan is “solar‑specific” – some lenders bundle installation costs into the loan, which can raise the APR.
- Check if the lender requires a personal guarantee; that can affect your credit profile.
- Ask whether the loan allows you to transfer the balance if you sell the home.
Solar Leases and Power Purchase Agreements (PPAs)
Leases and PPAs are the low‑upfront route. You essentially rent the system or agree to buy the electricity at a fixed rate, usually 15‑20 % lower than utility rates. The installer owns the hardware, handles maintenance, and claims the ITC.
For a homeowner who wants zero cash outlay, a lease can be attractive, but remember: you won’t own the panels, so you can’t claim the tax credit yourself, and you may have to buy out the lease if you move.
When a lease makes sense
- You have limited cash for a down payment.
- You plan to stay in the home for at least the lease term (usually 20 years).
- You want predictable monthly costs without the hassle of ownership.
Combining Incentives with Financing
The magic happens when you layer the ITC, state rebates, and a low‑interest loan together. For example, a 6‑kW system that costs $24,000 before incentives drops to $16,800 after the ITC. Subtract a $1,500 state rebate, and you’re looking at $15,300. Finance that amount over 15 years at 4 % and the monthly payment falls near $115 – often lower than the pre‑solar electricity bill.
Because the loan payment is usually tax‑deductible for businesses, commercial owners can see an even quicker ROI.
Tips to Maximize Savings
- Ask for a “post‑ITC” quote so you see the true out‑of‑pocket cost.
- Bundle a battery storage system with the solar contract; many states now offer separate incentives for storage.
- Schedule the installation before the end of the calendar year to lock in the current ITC rate.
- Consider a larger system than you think you need – the per‑watt cost drops, and you can use excess production to offset future rate hikes.
Bottom line: the headline question “How much do solar panels cost?” is only the start. By tapping federal credits, local rebates, and the right financing vehicle, you can turn a seemingly large expense into a manageable, even profitable, investment.
Conclusion
If you’ve made it this far, you probably already feel the weight of the question “How much do solar panels cost?” and the flood of variables that come with it. The good news? All those pieces—panels, inverters, racking, labor, permits, and incentives—fit together like a puzzle, and you can see exactly where each dollar goes.
In our experience, the smartest residential homeowners start by asking for a line‑item quote that separates hardware from soft costs, then apply the 30 % federal ITC and any state rebates you qualify for. That simple math often drops the net price into the $10‑$15 k range for a typical 6 kW system, which translates to a monthly payment that’s usually lower than your pre‑solar electric bill.
Business owners looking at solar financing should remember that loan payments are often tax‑deductible, and a larger system can shave a few dollars per watt off the $/W metric. And if a lease feels right, make sure the agreement lets you transfer the balance if you sell the property.
So, what’s the next step? Grab a quick estimate, stack your incentives, and compare that number against your current utility spend. When the numbers line up, you’ll see that “How much do solar panels cost” becomes less of a mystery and more of a clear path to savings. Ready to take the leap? Let Pep Energy walk you through the details.
FAQ
How much do solar panels cost before any incentives?
Most residential installs sit between $2.50 and $3.50 per watt in 2025. That means a 5‑kW system will usually run $12,500‑$17,500, while a 7‑kW setup can land in the $17,500‑$24,500 range. Prices vary by panel efficiency, inverter choice, and local labor rates, but those numbers give you a solid starting point before you factor in the 30 % federal tax credit or state rebates.
What are the main things that make the price swing?
First, the type of panels – monocrystalline tends to be $0.20‑$0.30/W more than poly‑crystalline. Next, the inverter: a string inverter is cheapest, while micro‑inverters add $1‑$2/W. Roof complexity adds $2,000‑$4,000 if you have multiple planes or flashings. Labor rates differ by region; New England can be $2.80/W, the Southwest often $2.20/W. Finally, permits, inspection fees, and any required utility upgrades tack on another 5‑10 %.
How does the federal Investment Tax Credit change the cost?
The ITC knocks 30 % off the total installed price, no matter what you spend on hardware or labor. So a $20,000 install becomes $14,000 after the credit. You claim it on your federal tax return, so you need enough tax liability to capture the full amount. If you don’t, you can carry the unused portion forward for up to five years, keeping the benefit alive.
Are there hidden costs I should watch out for?
Absolutely. Soft costs like interconnection fees, utility meter upgrades, or a longer conduit run can add $0.10‑$0.20 per watt. Some utilities charge a per‑kilowatt‑hour performance guarantee that shows up as a small annual fee. If you plan to add battery storage later, you might need a higher‑capacity inverter now, which can add a few hundred dollars upfront. Always ask for a line‑item quote that separates these items.
How can I estimate the total cost for my specific home?
Start by getting a detailed quote that breaks out panels, inverter, racking, labor, and permits. Then plug the hardware $/W into a spreadsheet, add 5‑6 % for labor and 8‑10 % for soft costs, and finally subtract the 30 % ITC and any state rebates you qualify for. Online calculators like Solar.com can automate those steps, but double‑check the numbers against the installer’s line‑item sheet.
Does a larger system really lower the per‑watt price?
Yes. Fixed costs – design, permitting, travel – get spread over more watts, so a 7‑kW system often costs $0.20‑$0.30/W less than a 5‑kW job. That’s why many homeowners add a couple of extra panels now; the extra upfront spend reduces the $/W metric and boosts future production, especially if you anticipate higher electricity rates or want to pair the system with storage later.
What financing option keeps my monthly payment manageable?
Solar loans are the most flexible: you front‑load the ITC, then repay the net amount over 5‑20 years at 3‑6 % interest. Because the loan interest is usually tax‑deductible for businesses, the effective cost drops even further. A $18,000 system after the credit, financed at 4 % for 15 years, works out to about $115 a month – often lower than the pre‑solar electric bill. A lease or PPA gives zero‑down start but you won’t own the hardware or claim the credit, and you may face a buy‑out if you move. In most cases, a low‑interest loan paired with the ITC and any state rebate yields the lowest monthly out‑of‑pocket cost.


