If you’ve ever stared at your electric bill and felt that sinking feeling of helplessness, you’re not alone.
That moment is exactly why residential solar installation has become the go‑to solution for homeowners who want control over their energy costs.
Imagine waking up, pulling the curtains, and seeing your panels already humming, turning sunlight into savings before you even brew your coffee.
Sounds like a dream, right? The reality is that a well‑planned residential solar installation can make that scene happen for real.
In our experience, the biggest hurdle isn’t the technology—it’s knowing where to start and what questions to ask.
You might be wondering: do I need a big roof? What about permits? How much will it actually cost?
The good news is that every step has a clear path, and the right partner can guide you through the paperwork, design, and installation without the guesswork.
When you look at the numbers, residential solar installation typically pays for itself in 5‑7 years, and the savings keep growing long after.
That’s because once the system is up, the sun keeps doing the heavy lifting while your utility bill shrinks.
And if you’re a homeowner thinking about future resale value, studies show homes with solar sell faster and often at a premium.
But it’s not just about money. There’s a genuine sense of pride watching clean energy flow from your roof to your appliances.
So, what should you do next? Start by taking a quick inventory of your roof’s orientation, shade patterns, and available space.
From there, a simple online tool can give you a rough estimate, and a local solar specialist can refine those numbers with a site visit.
Ready to take the first step? Let’s dive deeper into how a residential solar installation unfolds, from assessment to activation today.
TL;DR
Residential solar installation can slash your electric bill, boost home value, and give you clean energy independence, plus environmental peace of mind, within a few short years.
Start by checking your roof’s orientation and shade, then use a quick online estimator or a local specialist to map out costs, savings, and long‑term return on investment.
Understanding Solar Panel Types for Residential Solar Installation
When you start thinking about a residential solar installation, the first question that usually pops up is: what kind of panels should I put on my roof?
The short answer is – not all panels are created equal. Their silicon chemistry, cell architecture, and even the way the cells are wired can change how much sun turns into usable electricity.
Below, we’ll walk through the three families you’ll hear most often – monocrystalline, polycrystalline (the older sibling) and the new breed of N‑type cells – and give you a few practical checkpoints to match a panel to your home’s quirks.
If you’ve never seen a panel up close, the video below breaks down the visual differences and why they matter for a typical Phoenix roof.
Monocrystalline panels are the sleek, all‑black option you often notice on modern rooftops. Because they’re made from a single crystal of silicon, they boast the highest purity and therefore the best efficiency range – usually between 20 % and 24 % for residential models according to industry comparisons.
Polycrystalline panels, by contrast, are cut from multiple silicon fragments that are melted together. Their bluish, speckled look is a giveaway, and their efficiency typically sits around 15 %‑18 % as noted in the same review. They’re cheaper, but you’ll need more square‑footage to hit the same output.
That’s where the N‑type innovations come in. Over the past few years manufacturers have shifted to cell designs like heterojunction (HJT), TOPCon and back‑contact (IBC). These cells use N‑type silicon, which reduces the dreaded light‑induced degradation and pushes lab‑tested efficiencies past 24 % – some commercial‑grade modules even flirt with 25 % according to Clean Energy Reviews.
Why does that matter for a homeowner? Higher efficiency means you squeeze more watts out of each square foot. If your roof has shading from a chimney or limited space because of dormers, a 450 W high‑efficiency panel can replace two 250 W older‑style panels, cutting both material costs and mounting hardware.
Temperature coefficient is another hidden cost. Panels heat up on a hot Arizona day, and every degree above 25 °C chips away a few percent of power. N‑type HJT cells typically lose only about 0.25 % per degree, whereas traditional P‑type monocrystalline can be around 0.35 % as the analysis shows.
So, how do you decide? Here’s a quick checklist you can run during your site visit:
- Roof space – measure usable area.
- Shade – note any trees, vents, chimneys.
- Budget – factor panel cost vs number of panels.
- Future plans – are you adding a battery or expanding capacity?
If you have plenty of space and the budget allows, we usually recommend the top‑tier N‑type IBC or HJT modules – they pay back a bit faster because you need fewer panels and the degradation rate is lower. If you’re working with a tight budget but a roomy roof, a reputable monocrystalline line will still give you solid 20 %‑22 % efficiency and a reliable 25‑year warranty.
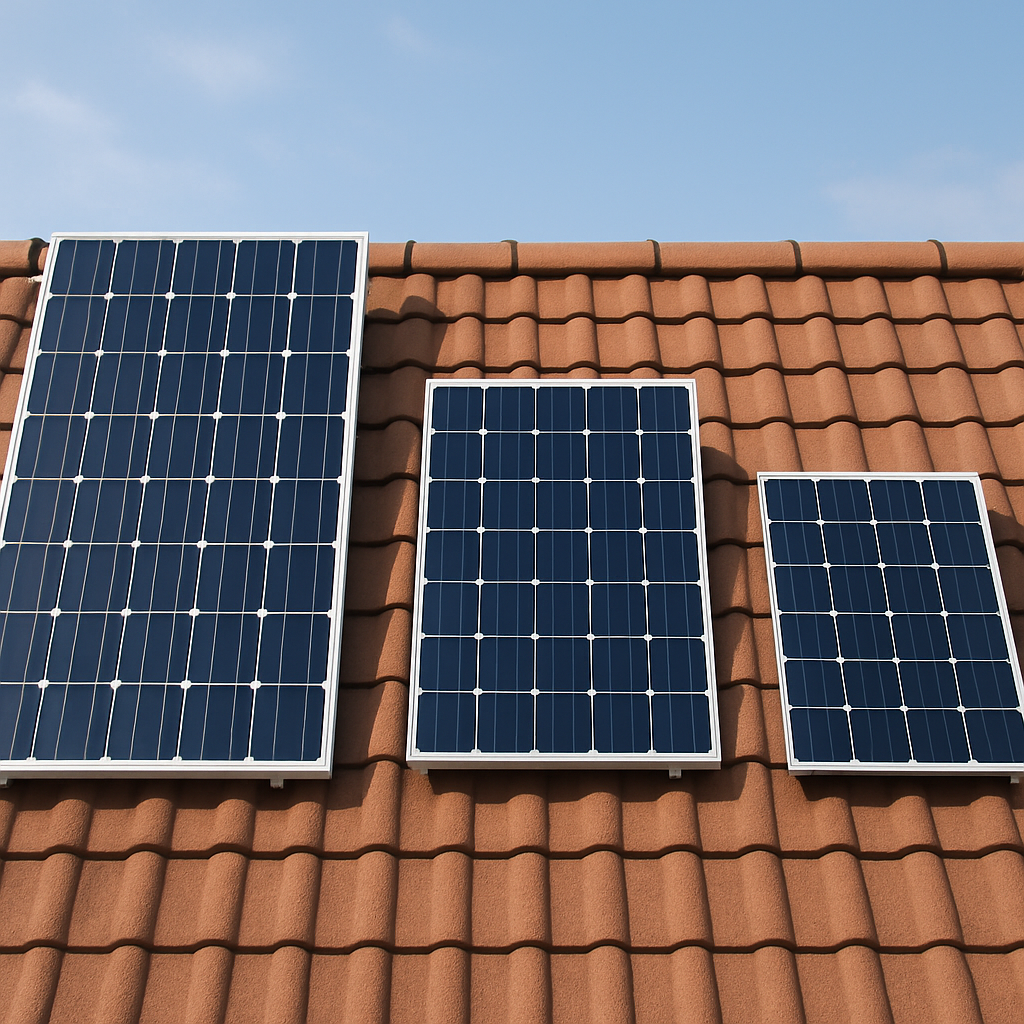
The picture below illustrates a side‑by‑side comparison of a standard 300 W poly panel, a 350 W monocrystalline panel, and a 470 W N‑type back‑contact panel, so you can see the size difference at a glance.

Bottom line: the panel you choose sets the ceiling for how much clean power you’ll harvest, but it also influences how much roof real‑estate you sacrifice and how the system behaves as the sun climbs higher. Take a moment to map your roof, weigh the efficiency versus cost trade‑off, and let a qualified installer run a shade‑analysis tool before you sign the contract.
Evaluating Roof Suitability and Structural Considerations
Most homeowners think “will my roof take panels?” and stop there. The honest answer: usually yes, but there are three things you need to check before you sign anything.
First: orientation, pitch and shade. Second: structural capacity—can the rafters and decking support the added weight? Third: the roof condition—do you need a re-roof before panels go on?
Quick roof checklist you can run in 10 minutes
Grab a tape, your phone, and a sketch of your roof. Measure usable area, note the pitch, mark chimneys, vents and trees, and take photos from the ground and from the eave if safe.
Does the roof face south, west, east, or a mix? South is best in most U.S. locales for a residential solar installation, but a west-facing array can still deliver strong afternoon production.
Structural loads and what they mean
Solar modules and racking add both dead load and wind/tilt load. Modern residential arrays typically add roughly 3–6 psf of dead load, but wind forces can be bigger depending on tilt and exposure.
So, how do you know your attic structure is adequate? Start by checking age and type: older 2×6 rafters at long spans may need reinforcement; modern trusses often have extra margin.
In our experience, most single-family roofs need only minor reinforcement or new blocking at attachment points. But don’t DIY the math—if the trusses are hidden or the house is older, call an engineer.
Warning signs that you need an engineer or a re-roof
Soft or sagging decking, repeated leaks or water stains in the attic.
Roof age near the end of its life (typically 20–30 years for shingles).
Complex roof geometry with many hips, valleys, or discontinuous rafters.
Does that mean you can’t go solar? Not at all. Often you re-roof first or add plywood and blocking in high-attachment zones, then install panels. It’s a better long-term move.
Permits, inspections, and where to look for guidance
Every permit authority expects a load-bearing check and a site plan. For a thorough permitting playbook and standard structural checklists, government guides are excellent references—see California’s permitting guide for process details and Rhode Island’s Guide to Going Solar for homeowner checklists.
Both documents explain what inspectors look for and what engineering letters typically need to contain. Use those templates when your installer prepares the permit packet.
Final tip: ask your installer for a roof-specific plan showing rafter attachment points, ballast or penetrating mount details, and a timeline for any re-roof work. If they can’t produce that, pause.
When to involve a structural engineer
When to involve a structural engineer: if the attic shows water damage, if the house has long rafter spans, or if you plan a heavy carport or canopy. An engineer will run span tables, calculate snow, wind, and seismic loads, and provide a signed letter for permits. That letter often speeds approvals and reduces installer risk.
Quick on-site test and records
Quick on-site test and records: have your installer inventory roof layers and attic photos, and note rafter sizes, spacing and any previous repairs. Keep the receipts and photos. You’ll thank yourself when the lender or future buyer asks for proof.
So, what should you do next? Make the sketch, take clear photos, flag any stains or soft decking, and share everything with your installer before they design the array. It saves time and surprises.
Bottom line: a careful roof and structural check turns uncertainty into a clear, permit-ready plan—so your residential solar installation actually performs for decades.
Financing Options and Incentives for Residential Solar Installation
Alright, you’ve figured out that solar panels will shave a chunk off your electric bill – now the big question is: how do you actually pay for them?
Understanding the Federal Solar Tax Credit
The biggest boost comes from the Residential Clean Energy Credit, which still offers a solid 30% of eligible expenses for systems placed in service between 2022 and 2032. After that the credit steps down to 26% in 2033 and 22% in 2034. It’s a non‑refundable credit, meaning it can only reduce the tax you owe, but you can carry any excess forward to future tax years.Read the IRS details on the credit. Keep in mind you can’t claim it if you’re renting the home or if the property isn’t your primary residence.
What does this mean for you? If you spend $20,000 on a fully‑qualified residential solar system today, the credit could slice $6,000 right off your federal tax bill. That’s a serious incentive that can turn a “maybe later” into a “let’s do it now.”
Financing Paths: Loans, Leases, and Power Purchase Agreements
Not everyone has cash on hand, and that’s perfectly fine. The market is full of flexible financing models that let you start saving from day one.
Solar Loans
Traditional loans (home equity, personal, or specialized solar loans) let you own the system outright while spreading the cost over 5‑20 years. Interest rates are often lower than credit‑card debt, and the monthly payment can be less than your previous electric bill. Remember: you keep the tax credit and any production‑based incentives.
Solar Leases
With a lease, a third party installs and owns the panels. You pay a fixed monthly fee that’s typically lower than your utility bill. The downside? You don’t get the federal tax credit, and you may have restrictions on upgrades or battery additions.
Power Purchase Agreements (PPAs)
A PPA is similar to a lease, but you pay per kilowatt‑hour generated instead of a flat lease amount. If the system produces more than you use, you could even see a credit on your bill. Like leases, the credit stays with the system owner.
Which option feels right for you? If you love owning assets and want the tax credit, a loan is usually the winner. If you prefer zero‑upfront cost and minimal maintenance hassle, a lease or PPA might be more appealing.
Stacking Incentives – Getting the Most Bang for Your Buck
Here’s a quick checklist to make sure you’re not leaving money on the table:
- Confirm the 30% federal credit applies to your system size and installation date.
- Check for any state or local rebates (many utilities run seasonal “sunshine” rebates).
- Ask the installer if they offer a “cash‑back” or “discount” for using their preferred financing partner – some lenders give extra rebates.
- Don’t forget net‑metering policies: they let you sell excess power back to the grid, effectively increasing your ROI.
By layering the federal credit with a low‑interest loan and any local rebates, you can often reduce the out‑of‑pocket cost to under 10% of the system price.
Real‑World Example
Meet Maya, a homeowner in Phoenix. She installed a 6 kW system costing $18,000. She qualified for the 30% federal credit ($5,400) and a $1,200 city rebate. Maya chose a 10‑year solar loan at 3.5% APR, which gave her a monthly payment of $132 – roughly $30 less than her previous electric bill. After the first year, the system saved her $1,200 in utility costs, so her net cash flow was already positive.
Sounds familiar? That’s the kind of scenario you can recreate with a little homework and the right financing partner.
Need a step‑by‑step walkthrough of the whole process? Our Residential solar installation guide: step‑by‑step to power your home walks you through budgeting, choosing a loan, filing the tax credit, and getting the system humming.
Bottom line: financing isn’t a roadblock – it’s a toolbox. Mix the federal credit, smart loan terms, and any local incentives, and you’ll watch the payback period shrink dramatically.
Choosing the Right Solar Installer and System Design
You’ve probably felt that mix of excitement and anxiety when you realize you need a partner to turn your roof into a power plant. That’s normal – the installer you pick will shape everything from how many panels fit on your roof to how smooth the paperwork feels.
So, how do you separate the noise from the truly qualified? In our experience, the first thing to check is longevity. A company that’s been around for 15‑20 years is far more likely to still be here when your 25‑year warranty expires. That simple fact saved a lot of homeowners from disappearing contractors.
Credentials that matter
Look for a license with the Arizona Registrar of Contractors (ROC) and verify it on the Arizona Registrar of Contractors (ROC) verification page. If the installer can’t point you to their ROC number on a business card or truck, walk away.
Beyond the state license, the gold standard is NABCEP certification. Installers who invest in that rigorous training have proven they can handle the high‑voltage work safely, and they’re required to keep up with the latest code changes.
Utility certifications matter, too. In Arizona, APS and SRP maintain lists of “Qualified Technology Installers.” A quick search of those lists will tell you if the company has passed the utility’s safety and performance checks.
In‑house vs. subcontracted crews
Companies that employ their own installers keep quality control under one roof. That means the salesperson who sold you the system is the same team that climbs on your roof, bolts the racking, and later services the equipment.
When a firm outsources the install, you end up with a middleman. It can work, but you lose a layer of accountability. If something goes wrong, you might be shuttling between sales reps and a third‑party crew.
System design basics
Now that you’ve narrowed down a few reputable installers, the next step is the actual design. A good installer will start with a shade‑analysis tool – often a LiDAR‑based app or a simple sun‑path diagram – to map out where the sun hits your roof throughout the year.
From there, they’ll decide on panel layout, inverter type, and whether you need micro‑inverters, string inverters, or optimizers. Each option has trade‑offs. For a roof with multiple orientations or partial shading, micro‑inverters or power optimizers usually squeeze more energy out of every panel.
Our friends at Paradise Solar explain that micro‑inverters give panel‑level monitoring, which can be a lifesaver when one panel underperforms because of a tree limb or debris (read more about inverter choices). The downside is a higher upfront cost, but the performance gain often pays for itself within a few years.
Actionable checklist
- Confirm ROC license and check the expiration date.
- Ask for NABCEP certification and a copy of the certificate.
- Verify utility‑approved installer status (APS or SRP list).
- Get a written, itemized quote that includes: panels, inverter, mounting, permits, roof inspection, and any required tree trimming.
- Request a site‑specific shade analysis report.
- Ask whether the quote includes a workmanship warranty (minimum 5 years) in addition to the manufacturer’s hardware warranty.
- Clarify who will do the post‑install service – in‑house team or subcontractor?
- Check the length and scope of the workmanship warranty – you want at least five years on labor and connections.
Real‑world example: The Johnson family in Tucson hired a local installer who met all the above criteria. The installer recommended a 7 kW system with high‑efficiency monocrystalline panels and a string inverter with optimizers because their roof had a small east‑facing section that was partially shaded by a neighboring tree. After a summer of monitoring, the system produced 12 % more energy than the initial estimate, thanks to the optimizers mitigating the shading loss.
Another scenario: A condo owner in Phoenix thought a lease would be easiest. The leasing company used an outsourced crew with no NABCEP certification. After six months, the inverter failed, and the lease contract gave the owner no recourse for repair costs. That story reinforces why the installer’s credentials are as important as the financing model.
Bottom line: Treat the installer selection like you would when hiring a contractor for a kitchen remodel. You want proven experience, transparent pricing, and a team that stands behind its work for the long haul. Take the time to vet licenses, certifications, and warranty terms, and don’t settle for the cheapest quote if it skips any of those steps.
Once you’ve signed with a vetted installer and approved the design, the next phase – permitting and installation – usually moves forward without a hitch. And that’s when you’ll start watching the sun do the heavy lifting for you.
Maintenance, Monitoring, and Performance Tracking
Okay, you’ve got those panels humming on your roof, but the work isn’t done once the installer walks away. Think of your solar system like a car – you don’t just buy it and never look under the hood again.
So, how do you keep that residential solar installation running at peak performance for the next 25 years? It’s a mix of regular check‑ups, smart data, and a little bit of habit‑forming discipline.
Why maintenance matters (even if you’re a DIY‑enthusiast)
Dirty panels, loose bolts, or an inverter that’s started to whine can shave 5‑15 % off your production. A quick glance at the numbers from a handful of PG&E‑served homes showed that panels that weren’t cleaned for six months generated about 12 % less energy than those cleaned quarterly.
And it’s not just grime – the climate in Arizona can be harsh. Heat‑induced expansion can stress mounting hardware, while occasional hail or wind can knock a panel out of alignment.
Does this sound like a lot of extra work? Not really, if you set up a simple routine.
Step‑by‑step maintenance checklist
- Visual inspection – twice a year (spring & fall). Look for cracked glass, loose brackets, or vegetation growing near the array.
- Cleaning – schedule a professional cleaning or a safe DIY rinse when you notice a noticeable dust layer. In desert areas, a quarterly clean often pays for itself.
- Inverter health check – most modern string inverters have a built‑in LED that flashes a fault code. Note any changes and contact your installer.
- Fastener torque – after the first year, have a technician re‑torque the mounting bolts. It’s a quick 30‑minute job that prevents long‑term creep.
- Warranty paperwork – keep the original warranty, inspection reports, and any service tickets in a folder. You’ll thank yourself when you sell the house.
Now, imagine you’re busy and can’t remember to do any of that. That’s where monitoring swoops in like a digital sidekick.
Monitoring: turning data into peace of mind
Most inverters ship with a basic portal that shows today’s production, but the real power lies in a dedicated monitoring platform. The U.S. Department of Energy outlines the key features you should look for – real‑time alerts, performance ratio dashboards, and even automated maintenance ticket creation DOE outlines monitoring platform features.
Here’s a quick way to get started:
- Ask your installer to enable panel‑level monitoring (micro‑inverters or power optimizers make this easy).
- Link the inverter’s Wi‑Fi or Ethernet port to your home router.
- Set up email or text alerts for “performance drop > 10 %” so you’re notified before the bill spikes.
Does this feel like tech overload? Not when you set the alerts to a simple green‑yellow‑red indicator – you’ll know at a glance whether everything’s humming or if something needs a look.
Real‑world example: the Martinez family in Tempe
When the Martinez family installed a 5 kW system last summer, they opted into a professional monitoring service that cost $8 per month. Two weeks after a severe dust storm, the platform flagged a 13 % dip in production. A quick call to their installer revealed a single panel had accumulated a layer of fine sand. One cleaning later, the system bounced back and they avoided a $150 surprise on their electric bill.
Contrast that with a neighbor who relied solely on the inverter’s basic app. He didn’t notice the dip until his bill jumped, and by then the panel needed a replacement, costing $600.
What’s the takeaway? Small, proactive monitoring can save you big bucks later.
Performance tracking tips you can implement today
First, record a baseline. Use the first month’s production as your reference point – most installers provide an “expected vs. actual” chart.
Second, calculate a simple performance ratio (PR):
PR = (actual kWh ÷ (system size kW × average sun hours per day × 30)) × 100. A PR of 80‑85 % is typical for a well‑installed residential system.
If your PR drops below 75 % for two consecutive months, it’s time to investigate.
Lastly, don’t forget the seasonal factor. Winter days are shorter, but colder temperatures actually improve panel efficiency. A dip in winter isn’t always a problem – compare against the baseline, not just the season.
Choosing the right monitoring approach
Below is a quick comparison to help you decide which level of monitoring fits your lifestyle and budget.
| Option | Frequency | Cost | Key Benefits |
|---|---|---|---|
| Self‑monitor via inverter app | Real‑time (free) | $0 | Basic production data, no subscription |
| Professional monitoring service | Real‑time alerts + monthly reports | $5‑$12 / month | Automated fault detection, warranty support |
| Full‑suite O&M contract | Quarterly on‑site inspection | $300‑$600 / year | Hands‑off maintenance, priority repairs |
Which option feels right for you? If you’re comfortable checking a phone app once a month, the free route works. If you prefer “set it and forget it,” the $8‑a‑month service is a sweet spot.
And remember, PG&E recommends having a licensed professional inspect your system every two years to catch any hidden issues before they become costly PG&E recommends regular inspections.
Bottom line: a little maintenance, a dash of monitoring, and a habit of tracking performance keep your residential solar installation humming, your bills low, and your peace of mind high.

FAQ
How long does a residential solar installation typically take from start to finish?
From the first site visit to the day the system flips on, you’re looking at roughly 6‑8 weeks for most Arizona homes. The timeline breaks down into a design & permitting phase (2‑3 weeks), a permitting approval window (often another 1‑2 weeks depending on the municipality), and the actual install plus commissioning (about 1‑2 weeks). If you need a roof repair, add another week or two.
Do I need a special roof type for a residential solar installation?
Not really – most standard shingle roofs handle solar panels just fine. The key is structural integrity: the roof must support the added 3‑6 psf load and be in good condition. If you have tile, metal, or a flat roof, we’ll use the appropriate mounting system. A quick visual inspection can spot sagging decking or old shingles that should be addressed before the panels go up.
What maintenance does a residential solar installation require?
Think of it like a car’s oil change: a few simple tasks keep it humming. Twice‑yearly visual checks for cracked glass or loose bolts, an occasional cleaning when dust builds up (quarterly in desert areas), and monitoring the inverter’s status via its app. Most warranties last 25 years, but keeping the hardware clean and tight can preserve that performance ratio above 80 %.
Can I monitor my system’s output on my phone?
Absolutely. Almost every inverter ships with a free portal that shows real‑time production, daily totals, and alerts if something drops more than 10 %. If you want panel‑level detail, micro‑inverters or power optimizers make that easy. Set up a push notification for a dip in output, and you’ll catch shading or a dirty panel before it hits your bill.
How does a residential solar installation affect my home’s resale value?
Studies consistently show solar‑equipped homes sell faster and for about 4‑5 % more, especially in sun‑rich markets like Arizona. Buyers love the lower utility bill and the green bragging rights. Just make sure the system is listed in the property disclosure and that the warranty transfers – that paperwork can be a real selling point.
What financing options are available for a residential solar installation?
You’ve got three main routes: a cash purchase (you keep the 30 % federal tax credit), a solar loan (you own the system and still claim the credit), or a lease/PPA (zero‑upfront, but the credit stays with the provider). A low‑interest loan paired with any local rebate can shrink out‑of‑pocket costs to under 10 % of the total price.
Do I need a permit for a residential solar installation?
Yes, every jurisdiction requires a building and electrical permit. The process usually involves submitting a one‑line diagram, a shade‑analysis report, and proof of structural compliance. Your installer should handle the paperwork, but it helps to have a copy of the roof’s load‑bearing calculations on hand. Once the inspector signs off, the utility will schedule the interconnection, and you’re good to go.
Conclusion
We’ve walked through everything from panel choices to permits, financing, and ongoing care, so you know what a residential solar installation really entails.
And now you might be wondering: is it worth the effort? In our experience, homeowners who take the time to map their roof, lock in the 30 % federal credit, and stick to a simple maintenance routine see payback in 5‑7 years and enjoy lower bills for decades.
Key takeaways
- Pick a panel that matches your roof space and budget – efficiency matters, but cost‑per‑watt does too.
- Get the proper permits and a signed structural engineer letter; it saves headaches later.
- Choose financing that keeps the tax credit in your hands – loans usually beat leases for long‑term value.
- Set up monitoring and a twice‑year visual check; a quick clean can recover 10 %‑15 % production.
So, what’s the next step? Grab a tape measure, snap a few photos of your roof, and reach out to a local installer you trust. If you need a partner who’s walked this path with dozens of Arizona families, Sean Whitmer can walk you through the details.
Remember, solar isn’t a “set‑and‑forget” gadget; it’s a partnership between your home and the sun. Keep an eye on performance, stay on top of incentives, and you’ll watch your energy costs shrink while your property value climbs.


