Ever stood on your porch, watching the sun blaze over the roof and thought, maybe I could turn that heat into power?
You’re not alone. Many homeowners feel that mix of excitement and uncertainty when they first hear the phrase “solar installation.” It sounds like a big step, but it doesn’t have to feel like a leap into the unknown.
Think about the last time your electricity bill made you wince. That moment—when you realize you’re paying more for a service you never really chose—sticks with you. Solar installation promises to flip that script, giving you control over the energy flowing into your home.
So, what does the process actually look like? In the simplest terms, a crew of certified technicians mounts panels on your roof, wires them to an inverter, and connects everything to your home’s electrical panel. It sounds straightforward, but there are a few decisions that can make or break the experience.
First, the roof itself. Is it sunny enough, and does it have the right pitch? Next, the size of the system—will a 5 kW array cover your average usage, or do you need something larger? Finally, financing. Whether you buy, lease, or finance, each option reshapes your upfront costs and long‑term savings.
Here’s a quick reality check: most homeowners see a noticeable dip in their bills within the first few months. The exact numbers vary, but the feeling of watching the meter spin slower is real and rewarding.
But let’s be honest—there are hurdles. Permits, paperwork, and coordinating with your utility can feel like a mini‑project. That’s why having a trusted partner who walks you through each step matters more than the shiny panels themselves.
Imagine you’re sipping coffee on a lazy Sunday, and the sun is doing its thing while you barely notice the lights staying on. That peace of mind—that you’re generating clean energy and shaving dollars off every month—is what we’re aiming for.
Ready to demystify solar installation? In the sections that follow we’ll break down sizing, costs, and the best financing tricks, all in plain language. No jargon, just clear steps you can actually follow.
Let’s dive in and see how easy it can be to turn sunshine into savings.
TL;DR
Solar installation turns rooftop sunshine into lower electric bills, giving you control over energy costs, a cleaner home, and lasting peace of mind.
We’ll walk you through sizing, financing, and the simple steps needed so you can start saving fast and feel confident about the process, every day, for years.
Step 1: Assess Your Site and Energy Needs
First thing’s first: take a good look at the roof that’s about to become your power plant. Does it face south (or north in the southern hemisphere)? Is it shaded by trees, chimneys, or nearby houses? Those details decide how much sunshine you’ll actually capture.
Grab your latest electric bill and pull out the numbers you care about – total kWh, peak‑day usage, and any spikes that happen when the AC kicks in. If you’re not sure where to start, a simple spreadsheet can turn those numbers into a clear picture of your monthly appetite.
So, what should you do next?
Check the Roof’s Health
Before any panels go up, make sure the structure can handle the extra weight. A quick visual inspection for cracked shingles, water damage, or a sagging deck can save you a costly re‑roof later. If you spot anything, fix it now – it’s cheaper than pulling panels off to repair the roof.
And don’t forget the pitch. Most panels perform best on a roof that’s between 15° and 30°; anything steeper may need extra mounting hardware.
Measure Your Sunlight
Sunny Arizona gets an average of 6.5‑7 peak sun hours per day, but every site is unique. Tools like solar site analysis AI can generate a quick sun‑exposure map using your address, letting you see how shading changes across the seasons.
Plug that data into a rough calculator: (sun hours) × (panel wattage) × (system efficiency) ≈ potential daily output. It’s not exact, but it tells you whether a 5 kW system will cover most of your usage or if you need to think bigger.
Does this feel overwhelming? Take it one step at a time – you’ll see it all click together.
Audit Your Energy Use
Break down your consumption by appliance. A typical air‑conditioning unit can gulp 1,500–2,500 W per hour, while a refrigerator hovers around 150 W. Knowing which loads dominate helps you size the array correctly.
For rural homeowners, the challenge often includes a larger backyard shed or farm equipment. The guide on farmhouse kitchen renovations in NSW shows how integrating solar into a rustic setting can still meet high‑energy demands without breaking the aesthetic.
Once you have a baseline, consider future changes – maybe an electric vehicle, a home office expansion, or a battery backup. Factoring those in now avoids a second‑hand system later.
Here’s a quick checklist you can print out:
- Roof orientation and tilt
- Shade analysis (trees, neighbors, vents)
- Structural integrity – no leaks or weak spots
- Average monthly kWh from utility bills
- Peak‑load appliances and future upgrades
- Local sun‑hour data (use an AI tool or solar map)
Now that you’ve gathered the data, it’s time to see how the numbers translate into a real‑world system.
Watch the short video above for a visual walk‑through of a typical roof assessment – you’ll see the same steps we just described, plus a few pro tips on measuring roof pitch with a simple angle finder.
When you’re comfortable with the numbers, you’ll need a partner who can turn that assessment into a proposal. Companies that blend solar expertise with solid financing options can streamline the quote process, and some even offer growth‑focused resources. Rebel Growth provides insights on scaling home energy projects, which can be handy if you’re thinking about expanding to multiple properties.
Remember, the goal isn’t just to slap panels on a roof; it’s to design a system that matches your lifestyle, budget, and long‑term goals. Take a moment to double‑check your checklist, compare a couple of estimates, and you’ll feel confident moving to the next step – sizing and budgeting.

With a clear picture of your site and energy needs, the rest of the solar journey becomes a lot less intimidating. You’ve done the hardest part – the research and self‑assessment – and now you’re ready to let the numbers guide your next move.
Step 2: Choose the Right Panels and Inverters
Alright, now that your roof has passed the shade‑check, it’s time to pick the hardware that will actually turn sunshine into electricity.
When it comes to a solar installation, the two stars of the show are the panels and the inverter – think of them as the solar panels’ muscles and the inverter’s brain.
The good news? You don’t need a PhD to compare them. Let’s break it down into bite‑size steps so you can walk away confident that the pieces you choose will fit your budget, space, and performance goals.
Panel efficiency matters more than you think
First up, efficiency. In plain English, a higher‑efficiency panel squeezes more watts out of each square foot of roof. That matters most if your roof is modest in size or you’re fighting shading from nearby trees.
Modern residential panels have leapt from the 15 % era to over 24 % today, with the top‑tier monocrystalline N‑type cells—especially the back‑contact (IBC) designs—hitting 25 % conversion rates according to Clean Energy Reviews.
What does that look like on the ground? A 440 W panel at 22.5 % efficiency will need roughly 2 m², while a 330 W panel at 17.5 % will eat about 2.4 m². Fewer panels mean less mounting hardware, lower labor, and a cleaner roof line.
Choosing the right panel type for your project
If space is at a premium—say a school gym roof or a tight residential lot—go for the high‑efficiency IBC or HJT modules. They cost a bit more per watt, but the extra price is often offset by needing fewer panels and less structural reinforcement.
On the other hand, if you have a sprawling, south‑facing roof with no shading, a solid mid‑range monocrystalline panel (around 20‑22 % efficiency) gives you the best bang for the buck. These panels are abundant, proven, and usually carry a longer warranty.
A quick rule of thumb: calculate the total wattage you need (your utility bill will tell you that), then divide by the panel’s watt rating. If the math forces you to cram more panels than the roof can hold, step up to a higher‑efficiency option.
Inverter options: string vs micro vs optimizer
Next, the inverter. Traditional string inverters are like a single highway: all panels feed into one unit. They’re reliable, relatively cheap, and work great when your array is uniformly illuminated.
But what if you have a few panels that will always sit in a slight shade? That’s where micro‑inverters or power optimizers shine. Each panel gets its own little brain, turning shade‑related losses into a minor dip instead of dragging the whole string down.
The California Energy Commission actually maintains a list of approved smart inverters on its Solar Equipment Lists, so you can verify that the model you like meets local interconnection standards.
For most residential projects, a hybrid approach works: a string inverter paired with optimizers on the edge panels. It keeps costs down while still protecting you from the dreaded “one shady panel kills the whole string” problem.
Checklist for picking panels and inverters
Here’s a quick cheat‑sheet to keep at your desk:
- Panel type – IBC/HJT for space‑limited roofs, standard monocrystalline for ample space.
- Efficiency rating – aim for 20 %+; the higher, the less area you need.
- Temperature coefficient – lower (‑0.25 %/°C to ‑0.30 %/°C) means better performance on hot days.
- Warranty – look for 25‑year product and 20‑year performance guarantees.
- Inverter style – string for simple layouts, micro or optimizer‑enhanced for partial shading.
- Certifications – ensure the inverter appears on the CEC’s smart inverter list.
| Feature | Option | Notes |
|---|---|---|
| Panel Efficiency | High‑efficiency IBC 24‑25 % | Best for limited roof space |
| Panel Efficiency | Mid‑range Mono 20‑22 % | Cost‑effective for large roofs |
| Panel Efficiency | Budget Poly 15‑18 % | Cheapest, but needs more area |
| Inverter Type | String | Simple, lowest cost |
| Inverter Type | Micro | Ideal for shading, higher cost |
| Inverter Type | Optimizer‑enhanced | Hybrid balance of cost and shade protection |
| Cost per Watt | High‑efficiency $0.42/W | Premium upfront |
| Cost per Watt | Mid‑range $0.30/W | Typical market price |
| Cost per Watt | Budget $0.20/W | Low upfront, larger array needed |
When you line up the numbers in that table with your roof’s square footage, the choice becomes a lot clearer. Remember, the goal isn’t just the lowest upfront price; it’s the best lifetime value—more kilowatt‑hours generated, fewer maintenance headaches, and a smoother grant application.
So, grab a calculator, plug in your roof dimensions, pick a panel efficiency that fits, and match it with an inverter style that mirrors your shading reality. Once you’ve locked those two pieces down, the rest of the solar installation process—permits, wiring, and the final “flip the switch” moment—will flow much more easily.
Step 3: Secure Permits, Incentives, and Financing
Alright, you’ve picked your panels and inverter – now comes the paperwork that makes the whole thing legal. It feels like a maze, but think of it as the gatekeeper that guarantees your solar installation is safe, compliant, and actually gets you paid for the electricity you generate.
What permits do you really need?
Most cities require a building permit, an electrical permit, and often a separate inspection sign‑off. The building permit confirms the roof can bear the extra load, while the electrical permit makes sure the wiring meets local code. After the crew finishes, a city inspector swings by to verify everything lines up with the approved plans.
Tip: ask your installer for a copy of the permit checklist before they start. That way you won’t be surprised when the city asks for a structural engineer’s signature two weeks later.
How to speed up the approval process
Every extra day your permit sits in a queue is a day you’re not saving money. Here’s a quick, three‑step cheat sheet:
- Gather every piece of documentation early – roof plans, shading analysis, and the exact equipment specs you’ll be using.
- Fill out the application yourself if you’re comfortable, or have the installer do it. Double‑check that the inverter model is on the state’s approved list (the DOE keeps a handy list of smart inverters).
- Submit the fee with a credit‑card payment to avoid mailing delays.
In many jurisdictions, the average soft‑costs – those non‑hardware fees – make up roughly two‑thirds of the total residential system price. Getting those permits right the first time can shave a few hundred dollars off that bill.
Unlocking incentives
Now that the paperwork is moving, let’s talk cash back. Federal tax credits, state rebates, and utility‑level net‑metering programs can collectively cover 20‑30% of your out‑of‑pocket cost. The key is timing: you usually have to claim the federal Investment Tax Credit (ITC) when you file your tax return for the year the system is placed in service.
If you’re in a state with a cash rebate, you’ll typically need to submit the approved permit copy, a final inspection report, and a signed “as‑built” diagram. One real‑world example: a suburban Phoenix homeowner saved $3,800 by filing the state rebate within 30 days of the final inspection.
Financing options that actually work
Choosing the right financing method can make or break the ROI you’re chasing. Here are the three most common routes, broken down in plain language.
Cash purchase – You own the system from day one, claim the full tax credit, and see the highest long‑term savings. It requires a sizable upfront payment, but many installers offer a 0% financing plan if you have a good credit score.
Solar loan – A loan lets you keep cash on hand while still owning the panels. Most loans are unsecured with a 5‑7% APR, and you can often get $0 down. The monthly payment is usually less than the amount you’d save on your utility bill, so you start seeing net positive cash flow immediately.
Lease or Power Purchase Agreement (PPA) – The solar company owns the hardware, you pay a fixed rate per kilowatt‑hour. It’s the lowest‑effort option, but you won’t claim the tax credit yourself, and the system’s resale value stays with the provider.
Which one feels right? If you plan to stay in the home for at least ten years, a cash purchase or low‑interest loan usually wins. If you’re on a tighter budget or expect to move soon, a lease or PPA might be the smoother road.
Actionable checklist
- Confirm your local jurisdiction’s permit requirements (building, electrical, fire).
- Collect roof plans, shading reports, and equipment specs.
- Submit the permit application with all fees paid electronically.
- Schedule the final inspection as soon as the crew finishes wiring.
- Gather the inspection report, permit copy, and as‑built diagram for incentive claims.
- Choose financing: cash, loan, or lease – run the numbers in a simple spreadsheet.
- File the federal tax credit on your next tax return; don’t forget state rebates.
Need a real‑world example to see how the numbers play out? A small business in Tucson installed a 10 kW system, used a 5‑year loan with $0 down, and captured a $2,500 state rebate plus the 30% federal credit. Within three years the monthly loan payment was lower than the old electric bill, and the net‑metering credits covered another 15% of usage.
If you’re still feeling a bit overwhelmed, remember you don’t have to go it alone. Many installers bundle the permitting and incentive paperwork into a “turnkey” service, charging a modest fee that’s often less than the cost of a missed rebate.
And hey, while you’re planning your solar future, you might also be thinking about an EV. Selene, the AI‑powered EV assistant can help you size a charger that pairs nicely with your new solar array, making sure you’re not paying extra for electricity you could be generating yourself.
Finally, a quick heads‑up: make sure the installer you hire is listed on the DOE’s smart inverter list – it smooths the interconnection step and avoids nasty surprises at the utility’s end.
By locking down permits, cashing in incentives, and picking the financing that matches your cash flow, you turn a bureaucratic hurdle into a clear path toward energy independence.
Step 4: Install Mounting System and Wiring
Let’s get the panels on the roof and the wiring nailed down, step by step, so your solar installation feels straightforward and safe. No surprises, just a clean job done.
First secure the racking to the roof structure following the engineered layout, bolt pattern, and torque specs from the structural engineer or manufacturer, confirm with a pull test and inspection.
If you have a tile or metal roof, swap in the correct flashing or clamp kit; wrong hardware is the fastest path to leaks and callbacks. Fix it now today.
Mount rails square and to the layout plan, shim where needed, and keep seams and penetrations sealed per code. Tiny gaps become big problems after winter, addressing them immediately please.
Wiring time. Do you want simple and safe wiring or a mess that haunts you at inspection? Route conduit and cable runs along racking, avoiding gutters and HVAC ducts always.
Keep DC conductors short and grouped, and separate the AC runs; that reduces loss and keeps troubleshooting logical. Label both ends of every cable clearly. Use UV labels and shrink.
Think about stringing: series increases voltage, parallel increases current. For a clear primer on series versus parallel wiring and practical diagrams, see EcoFlow’s wiring guide, linked for easy reference today.
Microinverters change the rules: conversion happens at the module level, reducing string voltage limits and shade impacts. Consider microinverters if your roof has multiple orientations or patchy shade, often helpful.
Grounding and bonding matter. Tie all metal racking to the house grounding electrode system per code, and use listed rapid shutdown devices where required by the utility or inspector promptly.
Now the inverter and battery wiring. Install conduit to the main service entrance and leave service loops for future changes. Pull conductors carefully; don’t nick insulation or you’ll regret it.
Label AC disconnects, and install the utility-required meter socket or transfer switch. Schedule the inspection before you energize the system; an inspector catching an error saves weeks of headaches seriously.
Want a tighter primer on wiring safety and planning? The technical report repository provides high-level guidance and standards you can reference for structural and interconnection concerns, see NREL technical report.
Final safety steps: install DC disconnects near the array, AC disconnects near the service, torque every lug to spec, and use anti-corrosion protectants on exposed fasteners, check annually, document everything.
How will you test it? Start with continuity and polarity checks, then insulation resistance testing, then energize islanded circuits before full grid tie. Keep a digital checklist for signoff always.
Quick checklist: racking torque, flashed penetrations, conduit secured, correct stringing, labeled conductors, disconnects installed, grounding verified, inspector scheduled. Missing just one item can delay activation. So take your time now.

That’s it—mounting and wiring done with intention. After inspection, flip breakers in sequence, monitor production, and log outputs. Small habits in commissioning save big time later, call your installer today.
Step 5: Connect to the Grid and Commission the System
You’ve got the panels up, the wiring checked, and the inspector gave you the thumbs‑up. Now comes the part that feels a bit like flipping a switch on a new car—connecting your solar installation to the utility grid and getting that final green light to start feeding power.
Apply for interconnection
First thing: you need permission from your utility. That usually means filling out an interconnection application, which asks for your address, a snapshot of past electricity usage, and the specs of the system—size, inverter model, expected production.
Most installers will handle the paperwork, but it helps to know what’s in it. The application is the gateway to two major milestones: the utility’s approval and the Permission‑to‑Operate (PTO) you’ll need before you can actually turn the system on.
EnergySage points out that the interconnection process for residential solar typically takes two to three weeks, and then another week or two for PTO after the install is done according to EnergySage. Knowing this timeline lets you set realistic expectations with your family—no surprise “no power” days.
Tip: keep a copy of the completed form, your utility account number, and a quick sketch of where the inverter will sit. If the utility flags any missing info, you’ll be ready to respond fast and avoid delays.
Schedule the utility inspection
Once the paperwork’s in, the utility will send a representative to your property. They’ll check the inverter, look at the connection inside your main panel, and make sure the new meter (or upgraded one) can track the kilowatt‑hours you export.
That’s the moment you’ll hear the words “Permission to Operate.” When the utility signs off, you get a simple document—sometimes just an email—that says you’re cleared to energize the system.
Does this sound intimidating? Not really. It’s basically a safety walk‑through. If you’ve kept your labeling tidy and your disconnects installed, the inspector’s job is quick.
Commissioning: testing before you turn it on
Before you flip any breakers, run a quick commissioning checklist. It’s like a pre‑flight safety drill for your solar array. eAuditor offers a ready‑made template that covers visual inspections, continuity checks, polarity verification, and insulation resistance testing as described by eAuditor. Use it on a tablet or print it out—just tick each item before moving on.
- Confirm all DC and AC disconnects are locked out.
- Verify inverter settings match the utility’s interconnection agreement.
- Perform a continuity test on each string to catch any loose connections.
- Check polarity on all DC leads—reverse polarity can fry the inverter.
- Run an insulation resistance test; values below 1 MΩ usually indicate a problem.
- Document the results and have the inspector sign off.
After the checklist is clean, you can energize the system in stages. Turn on the DC disconnects first, then the AC disconnect, and finally the inverter. Watch the display for any fault codes—most modern inverters will tell you exactly what’s wrong if something’s off.
And don’t forget to log the first day’s production. A quick screenshot of the inverter’s portal or a handwritten note of the kWh generated helps you spot any early‑stage issues and gives you a baseline for future performance checks.
What to do if something goes wrong
If the inverter throws an error, shut everything down, double‑check your wiring, and call your installer. Most hiccups are simple—like a loose lug or a mis‑labeled conduit—and are fixed in minutes.
Remember, the whole point of this step is to give you confidence that your solar installation is safe, legal, and ready to start saving you money. Once PTO is in hand and the commissioning checklist is signed, you can finally sit back, enjoy the sunshine, and watch your electric bill shrink.
Step 6: Maintain and Optimize Performance
Now that your solar installation is humming, the real work begins: keeping it humming. Think of your panels like a car—if you never change the oil or check the tires, you’ll eventually end up stranded.
Routine visual inspections
Every few months, walk up to the roof (or have a professional do it) and give the array a once‑over. Look for cracked glass, loose bolts, or anything that looks out of place. A stray bird’s nest or a bunch of leaves can cast a tiny shadow that eats away a few percent of output over time.
Repsol notes that simple visual checks and occasional cleaning are the cheapest ways to keep panels operating near their rated efficiency according to Repsol’s maintenance guide.
Cleaning the glass
If you live in a dusty area or near a construction site, wipe the surface with a soft cloth and mild soap no more than once a year. Avoid pressure washers—too much force can micro‑scratch the anti‑reflective coating.
And don’t forget the corners; dirt loves to hide in the frame’s crevices.
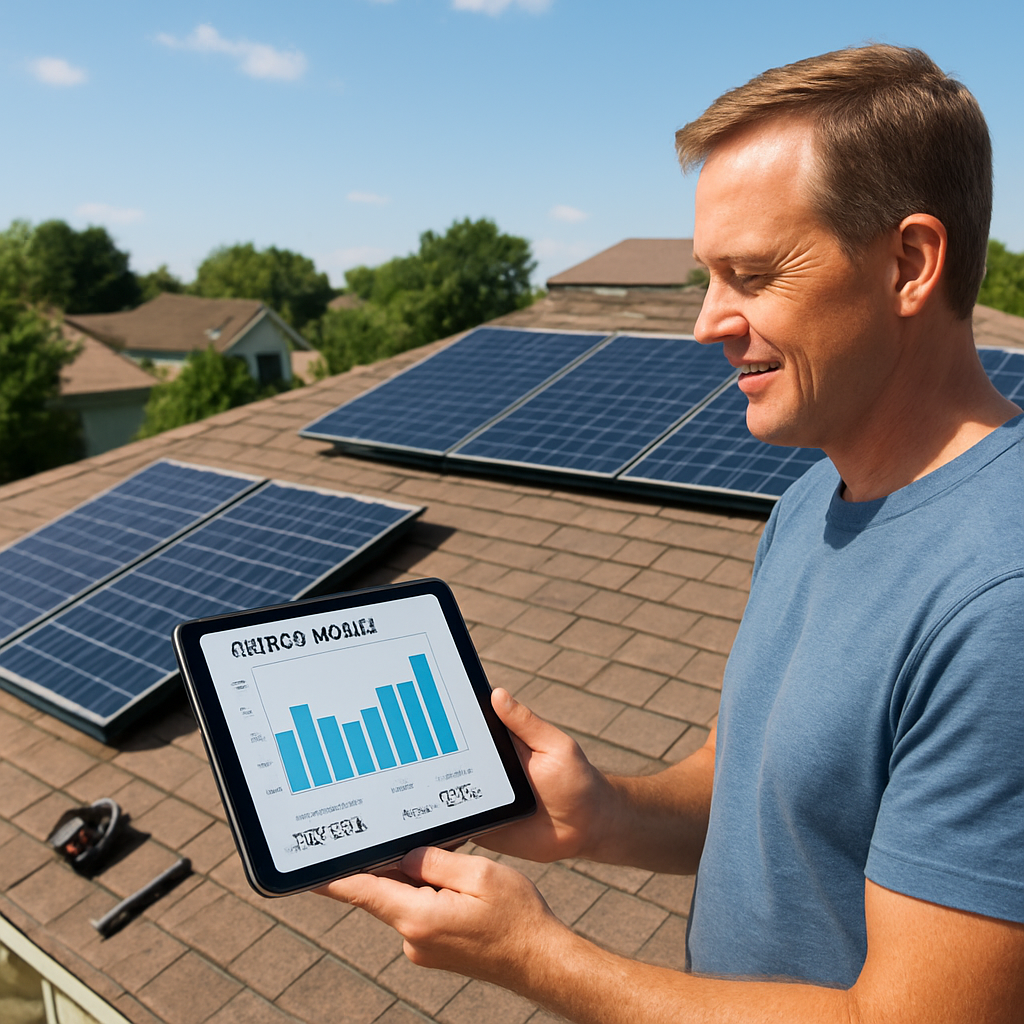
Performance monitoring
While a glance at the inverter’s display is nice, you’ll miss trends if you only check once a month. A monitoring platform lets you see hourly production, spot dips, and get alerts before a tiny issue becomes a costly shutdown.
SolarEdge’s monitoring platform gives you a detailed real‑time view of every inverter, plus automated alerts that flag under‑performance as described on SolarEdge’s site.
Using a monitoring platform
Set up daily email summaries or push notifications on your phone. When production drops more than 10 % compared to the same day last month, investigate the string that’s lagging.
Most platforms also let you export data, which is handy when you need to prove savings for a utility rebate renewal.
Preventive maintenance checklist
- Check all mounting hardware for tightness; torque any loose bolts to the manufacturer’s spec.
- Inspect DC and AC disconnects for corrosion; clean with a non‑abrasive brush.
- Run a quick insulation resistance test on each string (values above 1 MΩ are good).
- Verify inverter firmware is up‑to‑date; manufacturers often release efficiency‑boosting patches.
- Look for shading changes—new trees, seasonal foliage, or rooftop equipment that wasn’t there before.
- Document any findings in a log (date, issue, action taken) so you have a history to reference.
So, what should you do if a fault shows up? Shut down the affected circuit, double‑check connections, and call your installer if you’re unsure. Most issues are as simple as a loose lug or a label that got swapped during the original wiring.
Finally, think about the long‑term. If you’ve added a battery or plan to, schedule a performance review after the first 6 months of combined operation. The battery’s charge‑discharge efficiency can affect overall system yield, and you’ll want the inverter’s “smart” mode tuned for that load.
Seasonal adjustments
Winter brings snow, ice, and shorter days. After a snowfall, gently brush the panels with a soft roof rake—don’t use a metal shovel, because a slip can crack the glass. If ice builds up, let it melt naturally; applying hot water can stress the frame.
In the summer, the biggest enemy is heat‑induced voltage drop. Check that the inverter’s ventilation isn’t clogged with dust, and clean the surrounding area if needed. A quick fan‑blade sweep once a quarter can keep the temperature down enough to improve efficiency by a few percent.
Spring and fall are perfect times for a deeper dive: pull the disconnects, re‑torque the mounting bolts, and run a full performance audit using your monitoring platform.
- Winter: remove snow, inspect for ice damage, clear roof drainage.
- Spring: re‑check bolt torque, clean inverter fans, verify wiring labels.
- Summer: watch for overheating, clean debris around panels, check inverter ventilation.
- Fall: compare production data to previous year, schedule professional inspection if trends dip.
Make these habits part of your routine and you’ll treat your solar installation like a well‑tuned bike—regular check‑ups keep the ride smooth and the payoff steady.
By treating your solar installation like a living system—checking, cleaning, monitoring, and tweaking—you’ll squeeze every possible kilowatt‑hour out of those panels and keep your electric bill low for years to come.
Conclusion
All right, you’ve walked through everything from site checks to seasonal tune‑ups, and now the solar installation is humming on your roof. That steady flow of clean power isn’t magic—it’s the result of a few habits you’ve already started to master.
So, what’s the next small step that will keep that momentum going? Grab a notebook, jot down the season’s checklist we just covered, and set a calendar reminder for your first quarterly check‑up.
When you tighten those bolts in spring, clear snow in winter, and give the inverter a quick fan‑blade sweep in summer, you’ll squeeze every possible kilowatt‑hour out of the array. That habit‑loop turns a one‑time install into a low‑maintenance, long‑term money‑saver.
If you ever hit a snag—maybe a loose lug or an unexpected shade from a new tree—remember the quick troubleshooting list we built: shut down, double‑check, then call your installer. A few minutes of attention now saves weeks of downtime later.
Ready to lock in those savings and watch your electric bill shrink? Give Sean Whitmer a quick call or drop a message—let’s make your solar installation work for you year after year.
Remember, solar is a marathon, not a sprint, and consistency pays. Enjoy the sunshine, and let your roof do the heavy lifting.
FAQ
How often should I inspect my solar installation?
Give your roof a quick once‑a‑quarter walk‑through and a deeper look twice a year. In the spring and fall you’ll spot loose bolts, check torque, and make sure flashings are sealed. Summer and winter checks can be brief—just glance for snow buildup or debris. A visual inspection that takes 10‑15 minutes each time catches most issues before they turn into costly repairs, keeping your solar installation humming.
What’s the best way to clean solar panels without damaging them?
Cleaning is simple, but gentle. Use a soft‑bristle brush or a sponge with lukewarm water and a mild, non‑abrasive soap. Rinse with a hose on a low‑pressure setting—never a power washer, which can chip the anti‑reflective coating. If you’re on a steep roof, a long‑handled pole lets you reach panels from the ground safely. Do it once a year or after heavy dust storms for best results.
Can I monitor my system’s performance myself, and what tools should I use?
Yes—you can keep tabs on production from your phone or laptop. Most inverters ship with a built‑in portal; just create an account and link the device. Third‑party platforms like SolarEdge or Enphase also pull data via the cloud, offering real‑time graphs and alerts when output dips 10 % or more. Set up daily email summaries, and compare today’s kWh to the same day last month to spot shading or performance issues early.
What should I do if my solar inverter shows an error code?
If your inverter flashes an error, power it down before you start. First, check the obvious: is the DC disconnect open? Verify all cable connections are tight and that no label is swapped. Use a multimeter to confirm correct polarity and voltage on each string. Most error codes are listed in the installer’s manual—look them up and follow the suggested reset steps. If the fault persists, call your installer; they’ll usually replace a faulty module within the warranty.
How do seasonal changes affect my solar installation and what adjustments are needed?
Seasonal shifts are the biggest hidden factor for a solar installation. In winter, snow and ice can block light; gently brush panels with a soft roof rake and clear debris before it hardens. Spring brings new foliage—trim any branches that start shading the array. Summer heat can raise inverter temperature; check that ventilation grills stay clear and give the fan blades a quick dust‑off. Fall is perfect for a full torque check on mounting bolts before the next cycle begins.
Is it worth adding a battery to my existing solar installation?
Adding a battery can turn your solar installation into a true backup system, but it’s not always necessary. If you experience frequent outages or want to store excess midday energy for evening use, a lithium‑ion battery like the Tesla Powerwall or a more affordable option from local vendors makes sense. Calculate the daily kWh you’d like to store, compare the cost per watt‑hour, and check if your inverter supports DC‑coupled storage. For most homeowners, a modest 5‑10 kWh battery delivers the best ROI.
How long does a typical solar installation last and what maintenance extends its life?
A well‑installed solar array typically lasts 25‑30 years, but its performance slowly degrades—about 0.5 % per year on average. Regular maintenance—tightening bolts, cleaning panels, and updating inverter firmware—can keep that degradation on the low end. Keep a log of inspections, and schedule a professional performance audit every five years to verify that output matches the warranty guarantees. By treating the system like any other home asset, you’ll maximize its lifespan and keep savings flowing for decades.


